It’s always nice to get my teeth into something interesting, this one was a little more challenging than it should have been though.
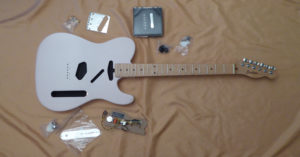
Before starting I had a look over the parts, just to make sure it’s all going to fit and work together.
Unfortunaltely the frets were very uneven. Sadly it’s never going to play properly like that. Even with a high action there would be a lot of fret buzz.
If you want to see what a really bad fretboard is like just click on the link below for a short video:
Personally, I never buy a guitar without running one of these up and down the neck to check it out. If it was like this I’d walk away from it.
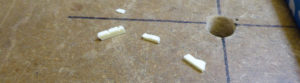
Before dressing the frets the nut has to come out, unfortunately it came out in pieces! It happens sometimes, it just means a little more work to cut and fit a new one. The old one was plastic so a bone one will better anyway.
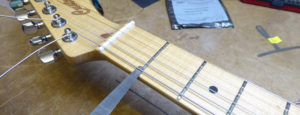
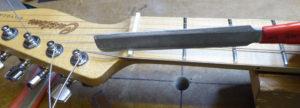
With the neck set perfectly flat, taped up to protect the finish, and the frets marked with marker pen im ready to start.
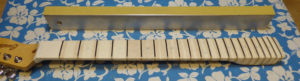
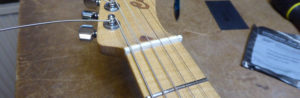
As I start you can see how low the first fret is, it’s not been even touched.
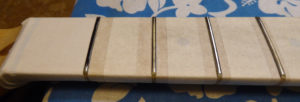
Further up the neck you can see the uneven low spots, where the marker pen hasn’t been touched.
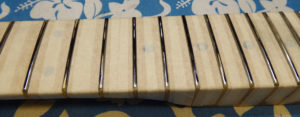
At the bottom end it was even worse, the 7th from the right is really low and only just been touched.
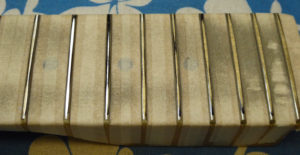
Once I’ve got down to the lowest spot the frets need to be re-rounded off again.
After dressing the frets most of the tops are this shape.

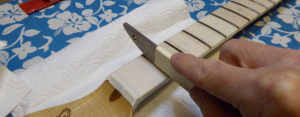
and need to be rounded off, down to the red line…

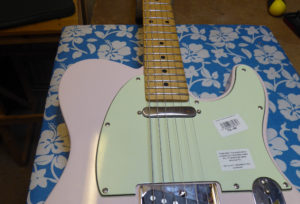
Once the frets have been re-shaped and polished it’s a fairly simple case of bolting it all together, with a new bone nut.
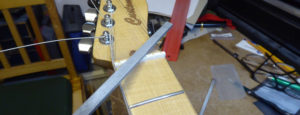
Luckily the neck went on fitted in a nice straight line.
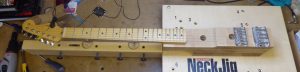
All that’s needed then is a full setup to get the action right. Since the truss-rod adjustment on this one is on the heel of the neck it’s impossible to adjust it with the guitar together. To get to the adjustment screw you have to take the neck off, which removes the string tension making it impossible to asses the neck relief.
This is a different neck, I forgot to take a picture, but the easy way is to bolt it onto the neck jig, that way I can measure the neck relief with strings at full tension.
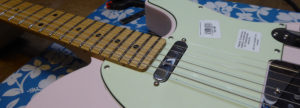
So, with the guitar together, the strings on and the relief correct, the next thing to set the bridge height, starting with the outside “E” strings.
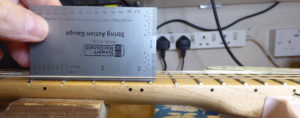
With the outside strings set it’s time to set the other four, to match the string heights to the radius of the neck.
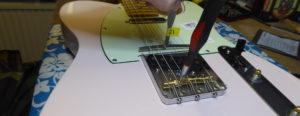
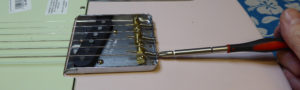
Back to the new nut. The slots need to be cut down to set the action at the first fret.
The top of the new nut was a little tall so now’s the time to file that down to size.
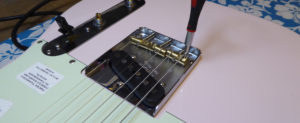
The last bit of the playing action, the Intonation.
Last of all, the pickup heights.

Unfortunately the knobs won’t fit. It’s a common mistake, these pots’ are metric with 18 spline shafts but the knos are for imperial, 24 spline pots’. It is possible to force them on, but I wouldn’t suggest it, it’s very easy to damage the pots’,
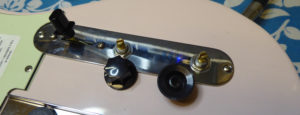
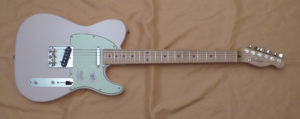
There it is, ready to rock (apart from a set of knobs)!
For anything else just go to www.guitar-george.co.uk