
There are two reasons why you might want to have your frets dressed, the first is if they have uneven heights, particularly if you want a low action.
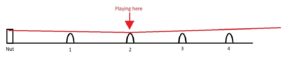
The diagram below, not exactly to scale, shows how when the string (the red line) is pushed down at the 2nd fret it should just clear the rest of the frets.
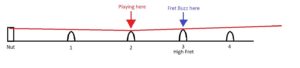
If however, the next fret (in this case the 3rd) is a higher than the rest, the string will buzz against the top, which is what we call “Fret Buzz”.
No.1 How to assess the problem?
That’s quite simple. All you need is a “Fret Rocker”, you can pick one up on e-bay for less than £5. All it is is a simple calibrated straight edge. Put it over 3 frets, if they’re nice and even it won’t move. If it rattles back and forward then the frets are uneven.
Personally I never buy a guitar without running a fret rocker up and down it first!
How to fix the problem…
The only way to achieve a decent playing action is to dress the frets, to even up all the fret heights. File all the fret tops down the the lowest one.
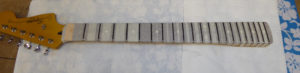
Step one, remove the neck (if possible). Take out the nut, tape up the fretboard to protect it and adjust the truss-rod to make sure it’s absolutely flat.
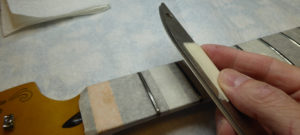
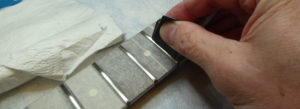
I also use a marker pen on top of each fret, so I can see where the file is touching.
Then using a calibrated straight edge and self adhesive sandpaper start grinding down all the frets. The file will initially only touch the high spots.
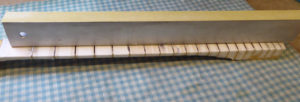
As soon as I start I can see instantly the high and low spots. Wherever the marker pen is untouched is a low spot…..
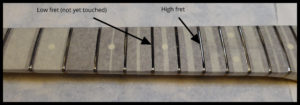
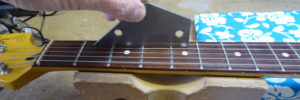
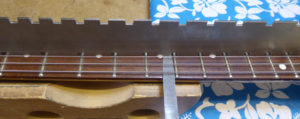
It’s just a case of carrying on until the file touches everywhere. You can see in the picture below, the levelling is just about done.
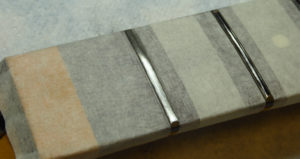
Now that all the fret tops are at the same height some, if not all of them, will need to be rounded off again.
The frets tops will be something like this……

so they need to be rounded off again. Down to the inner red line, like this….

I find a rounded dressing file is the easiest, to round off the shoulders without taking any more off the top, otherwise I’ll have to start again!
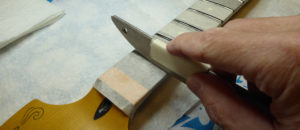
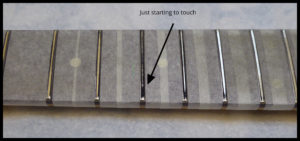
Once again I marked the top of each fret with marker pen, so I can see when the newly rounded shoulders meet.
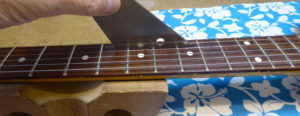
The picture below shows the first fret about half way done. This is the part of the job that takes the time.
That’s one fret done.
Once they’ve all been re-crowned, each fret needs to be polished up again. I use 4 different grades of micromesh in turn.
With the frets levelled and polished, all it needs now is re-assembling and a setup. Re-setting the action is an essential part since the neck relief was adjusted while the frets were being levelled etc.
So there we go, with a much improved playing action.
If you have any doubt about your guitar then just give me a call and bring it round. I’m happy to take a look and assess what needs to be done.