A fairly routine job. Take a standard Squire Stratocaster and those special touches which will make it so much better. The biggest setback to a really good playing action are the slightly uneven frets.
They are a little worn as well so a fret dress will sort out both problems.

The other problem lies in the machine heads. They are a little worn and tend to slip and so not stay in tune very well. The only way of sorting that out is to replace them with a better quality set. The problem there is that it’s impossible to find a quality set that will match the existing screw holes.

There is also a slight problem with the neck, when it was fitted they didn’t quite get it right, It’s at a slight angle, the strings sit closer to the bass side than the treble. I’ll take the neck off to dress it so might be able to sort that when I re-fit it…
First the machine heads. The new ones need slightly larger holes so I drilled them out with the pillar drill…
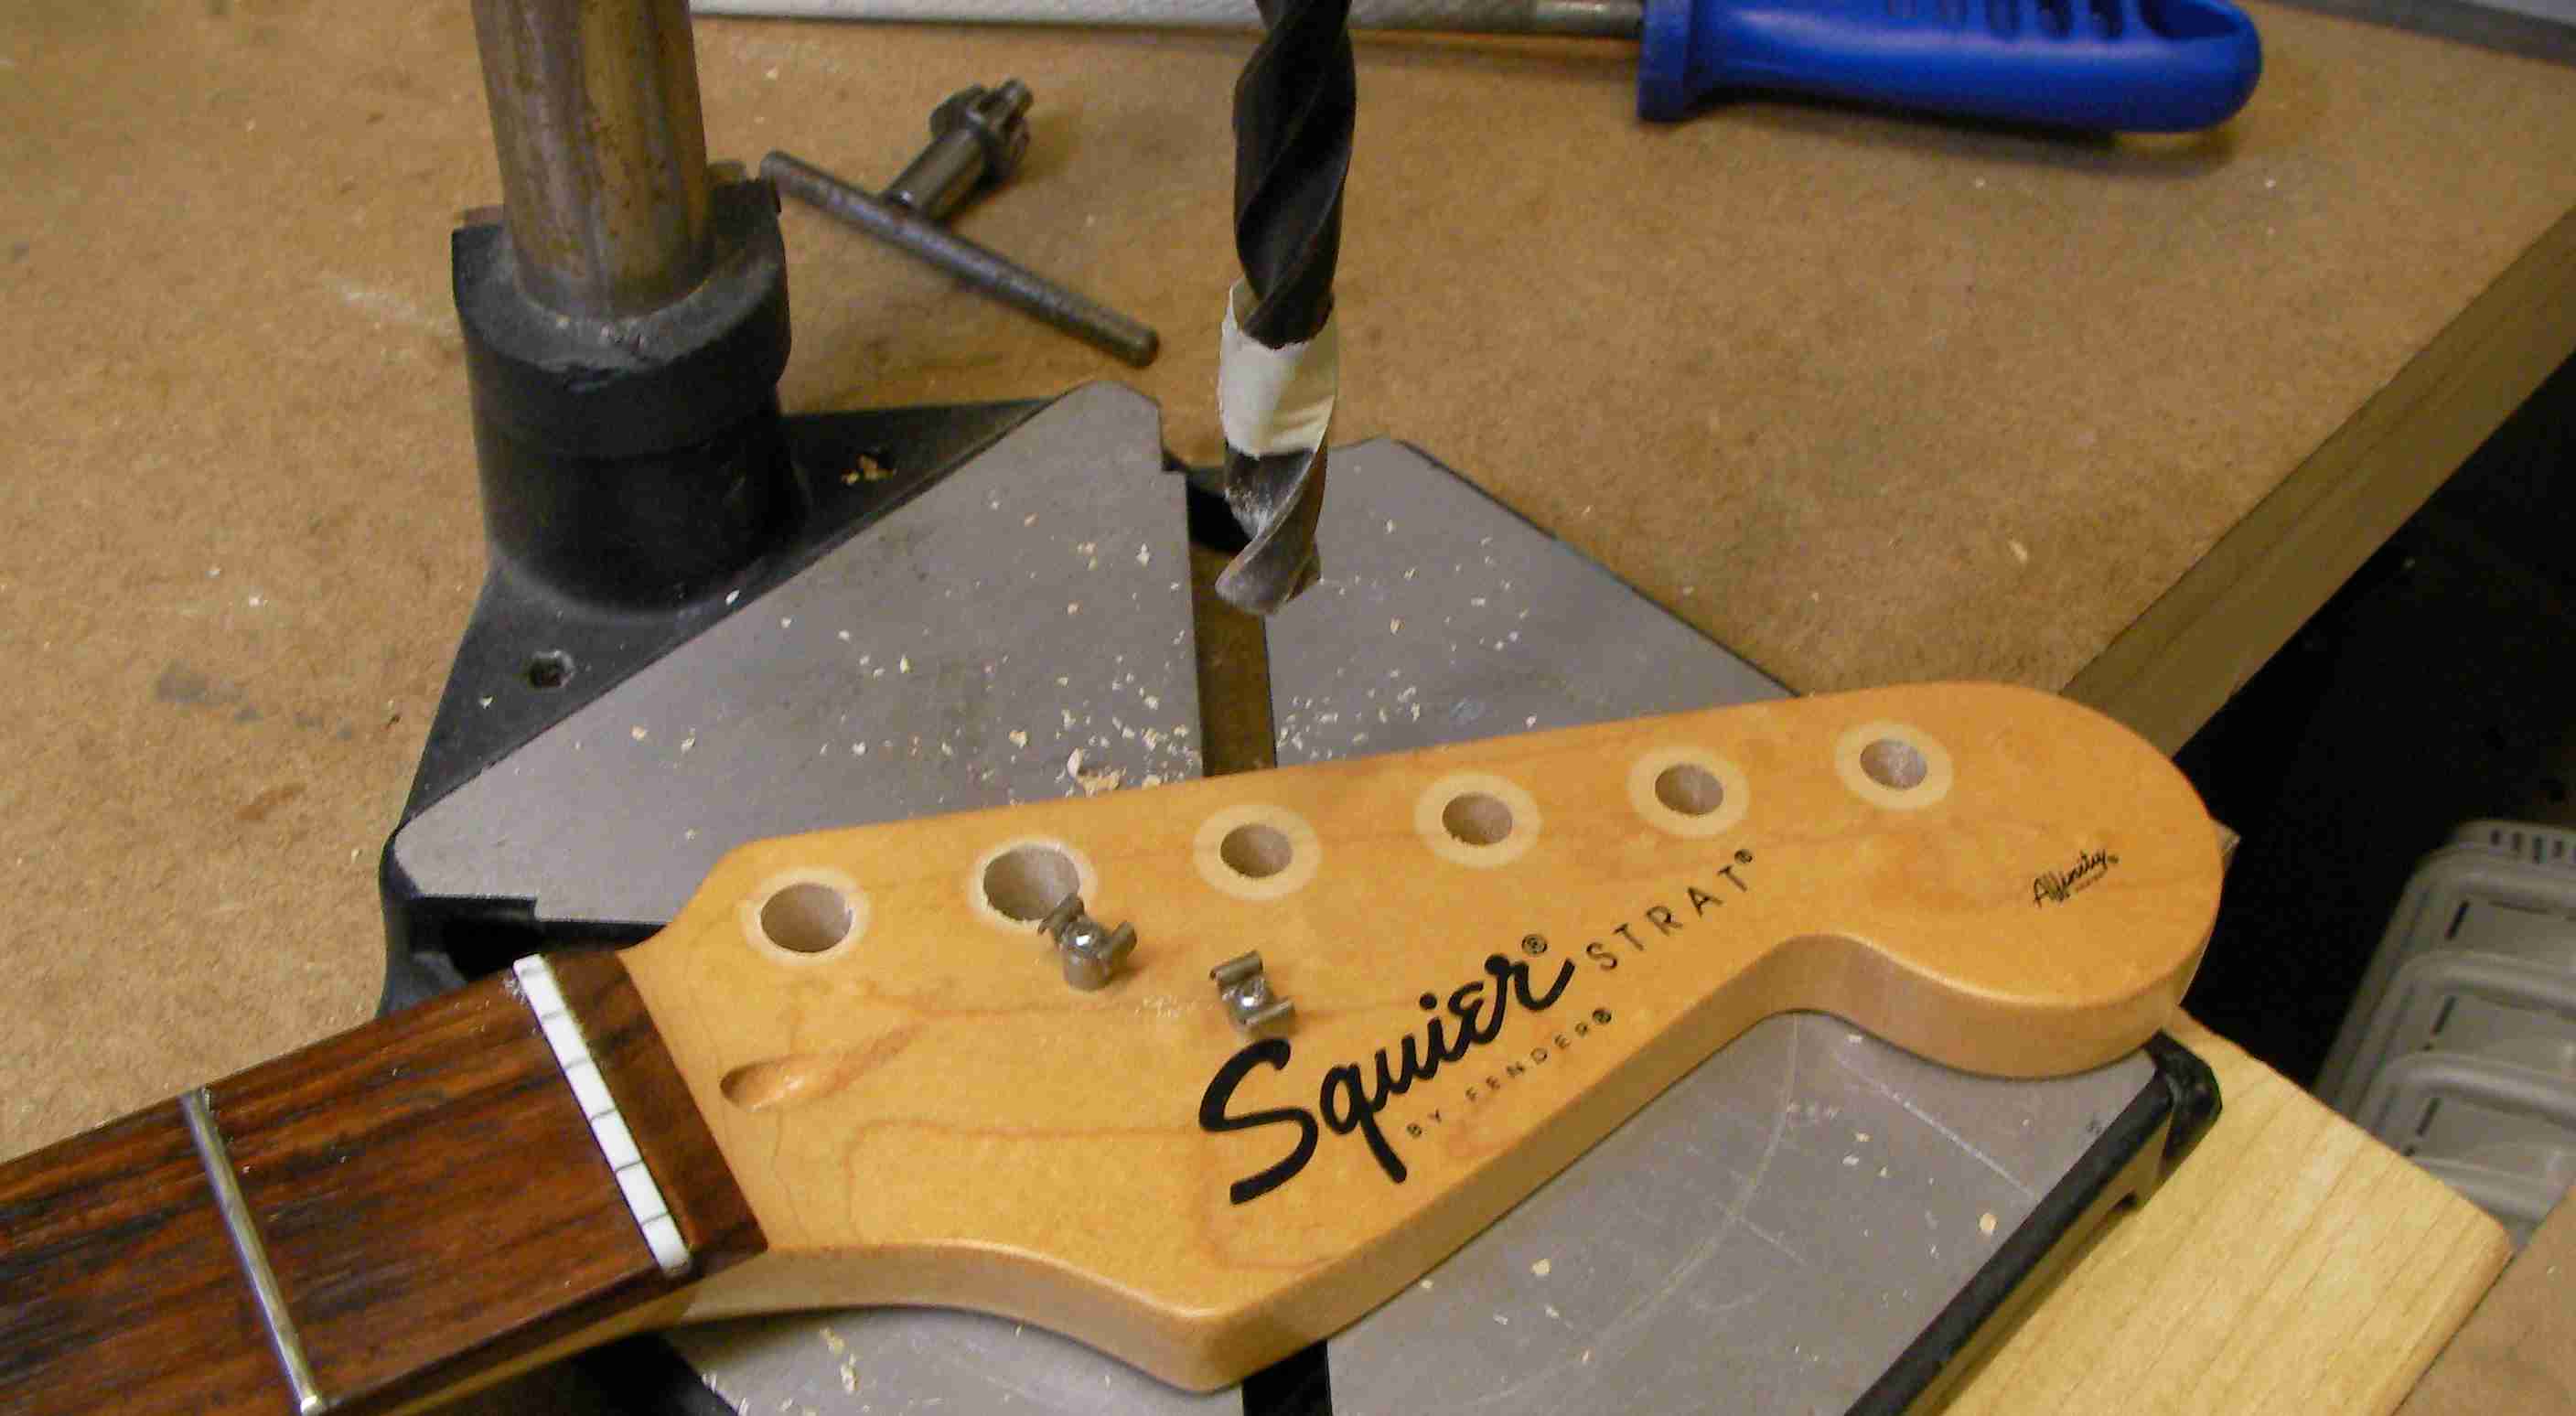
As I thought the screw holes don’t line up either….

Next then, drill out the old holes..
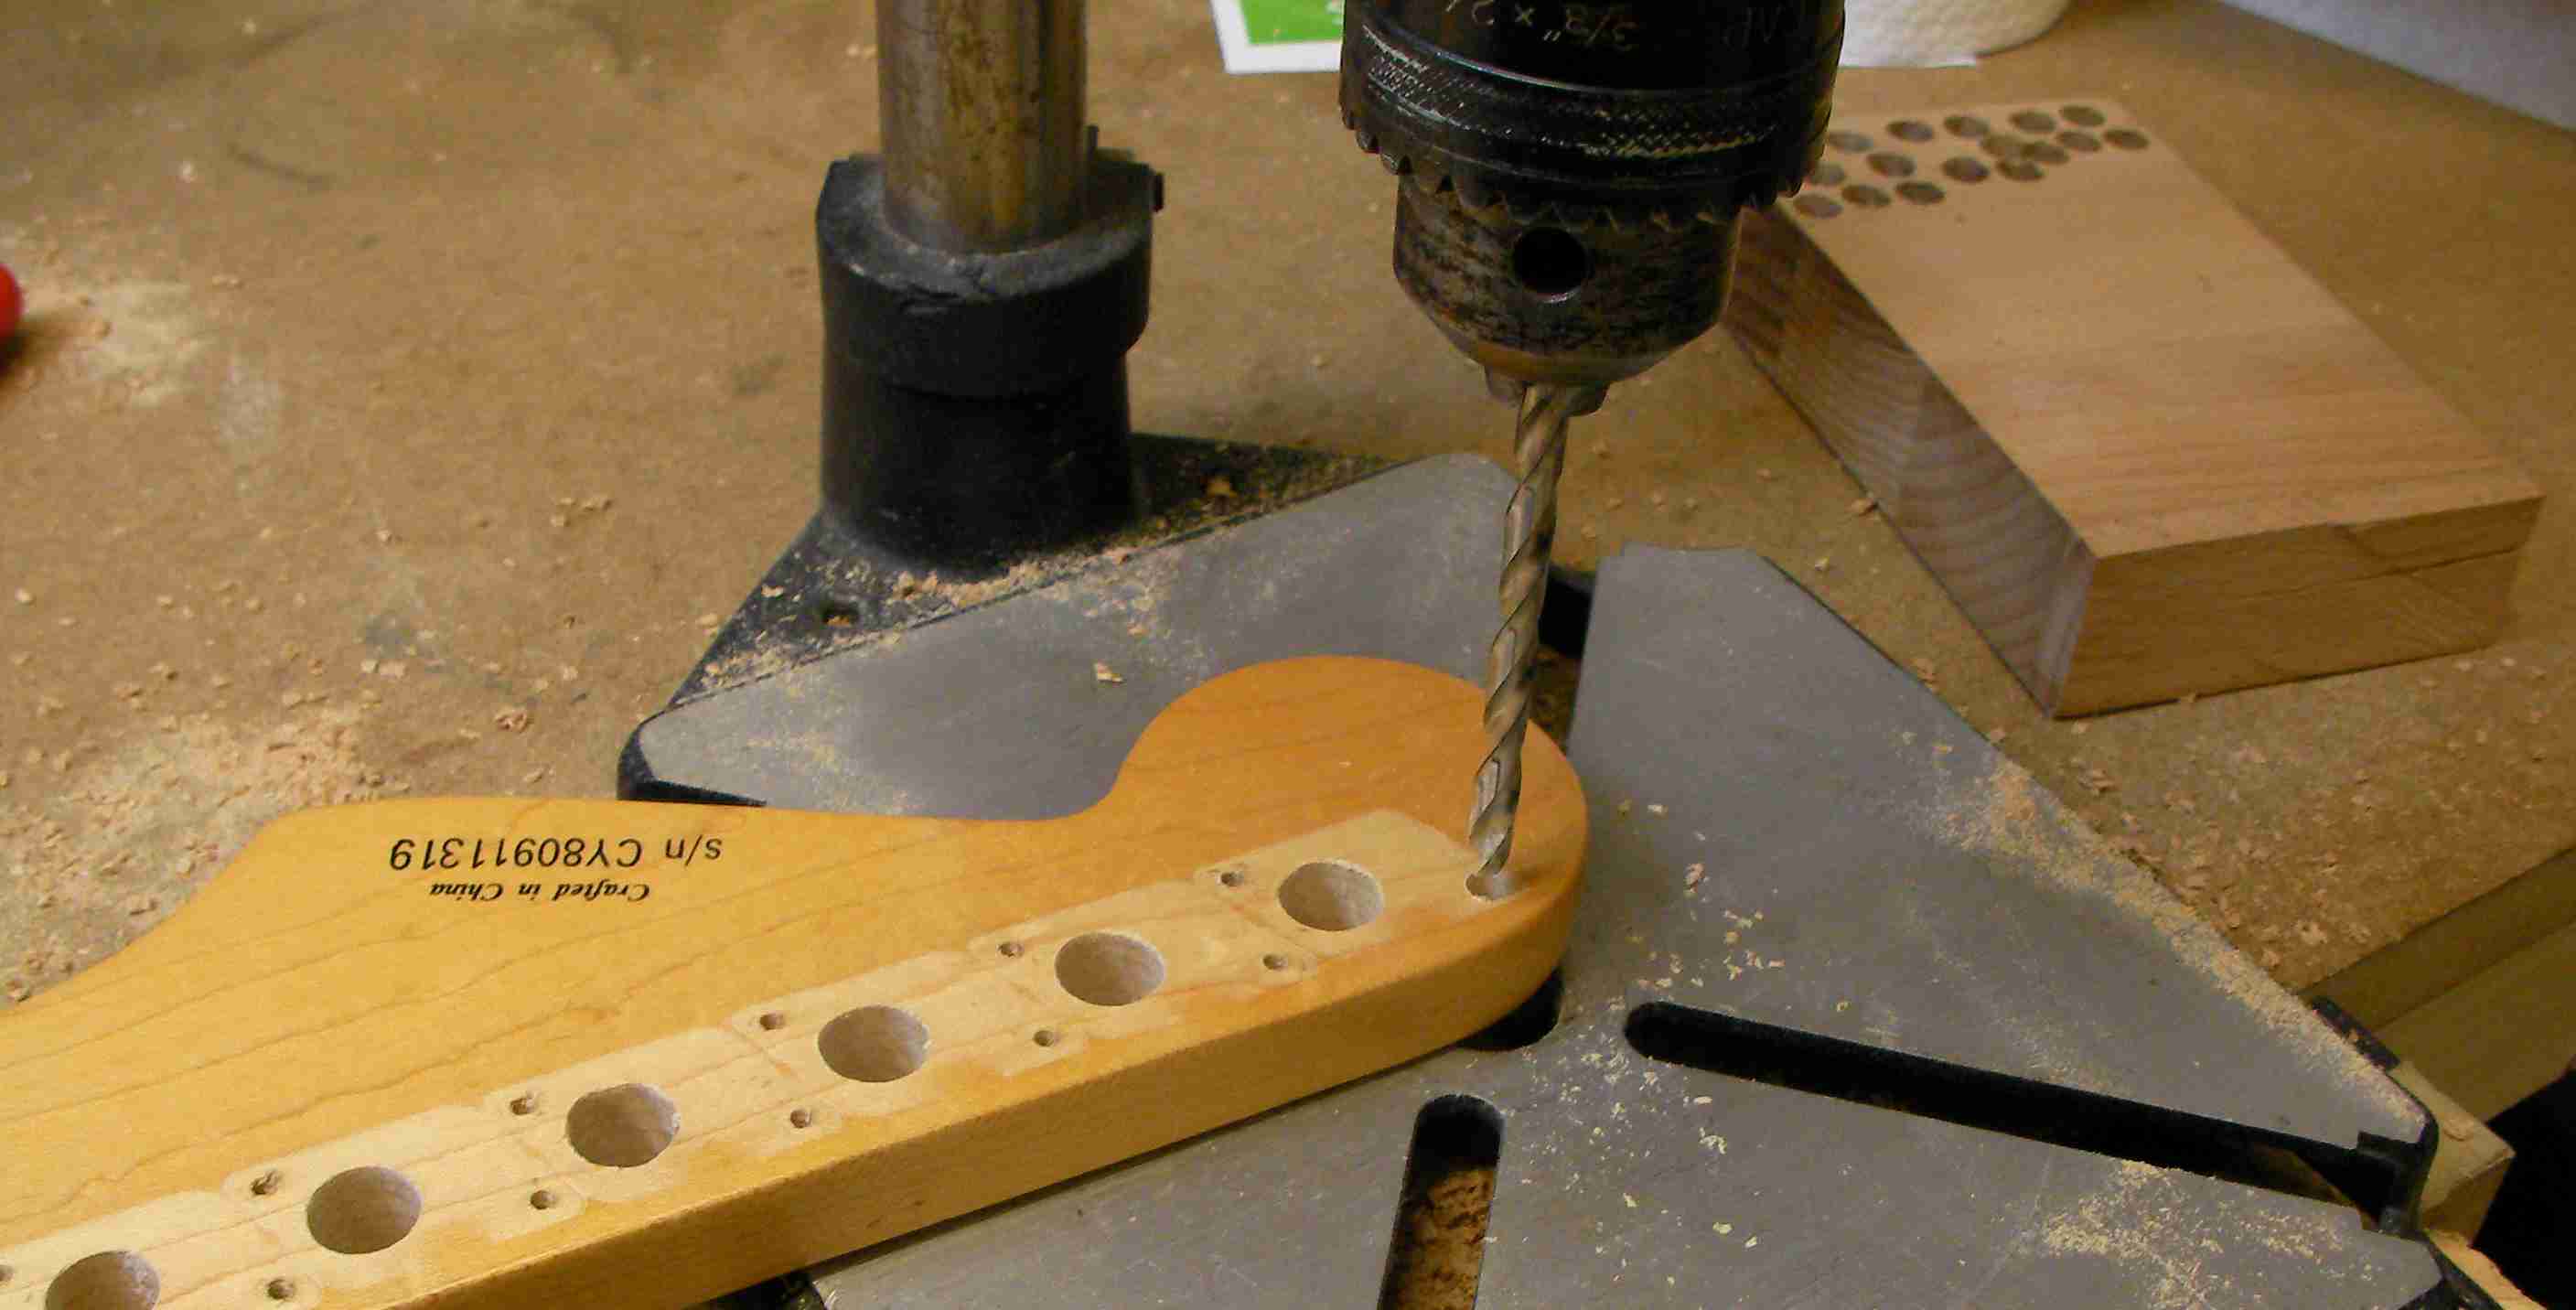
Not too deep, just deep enough to fit a wood plug. I cut the plugs from a spare piece of hardwood..
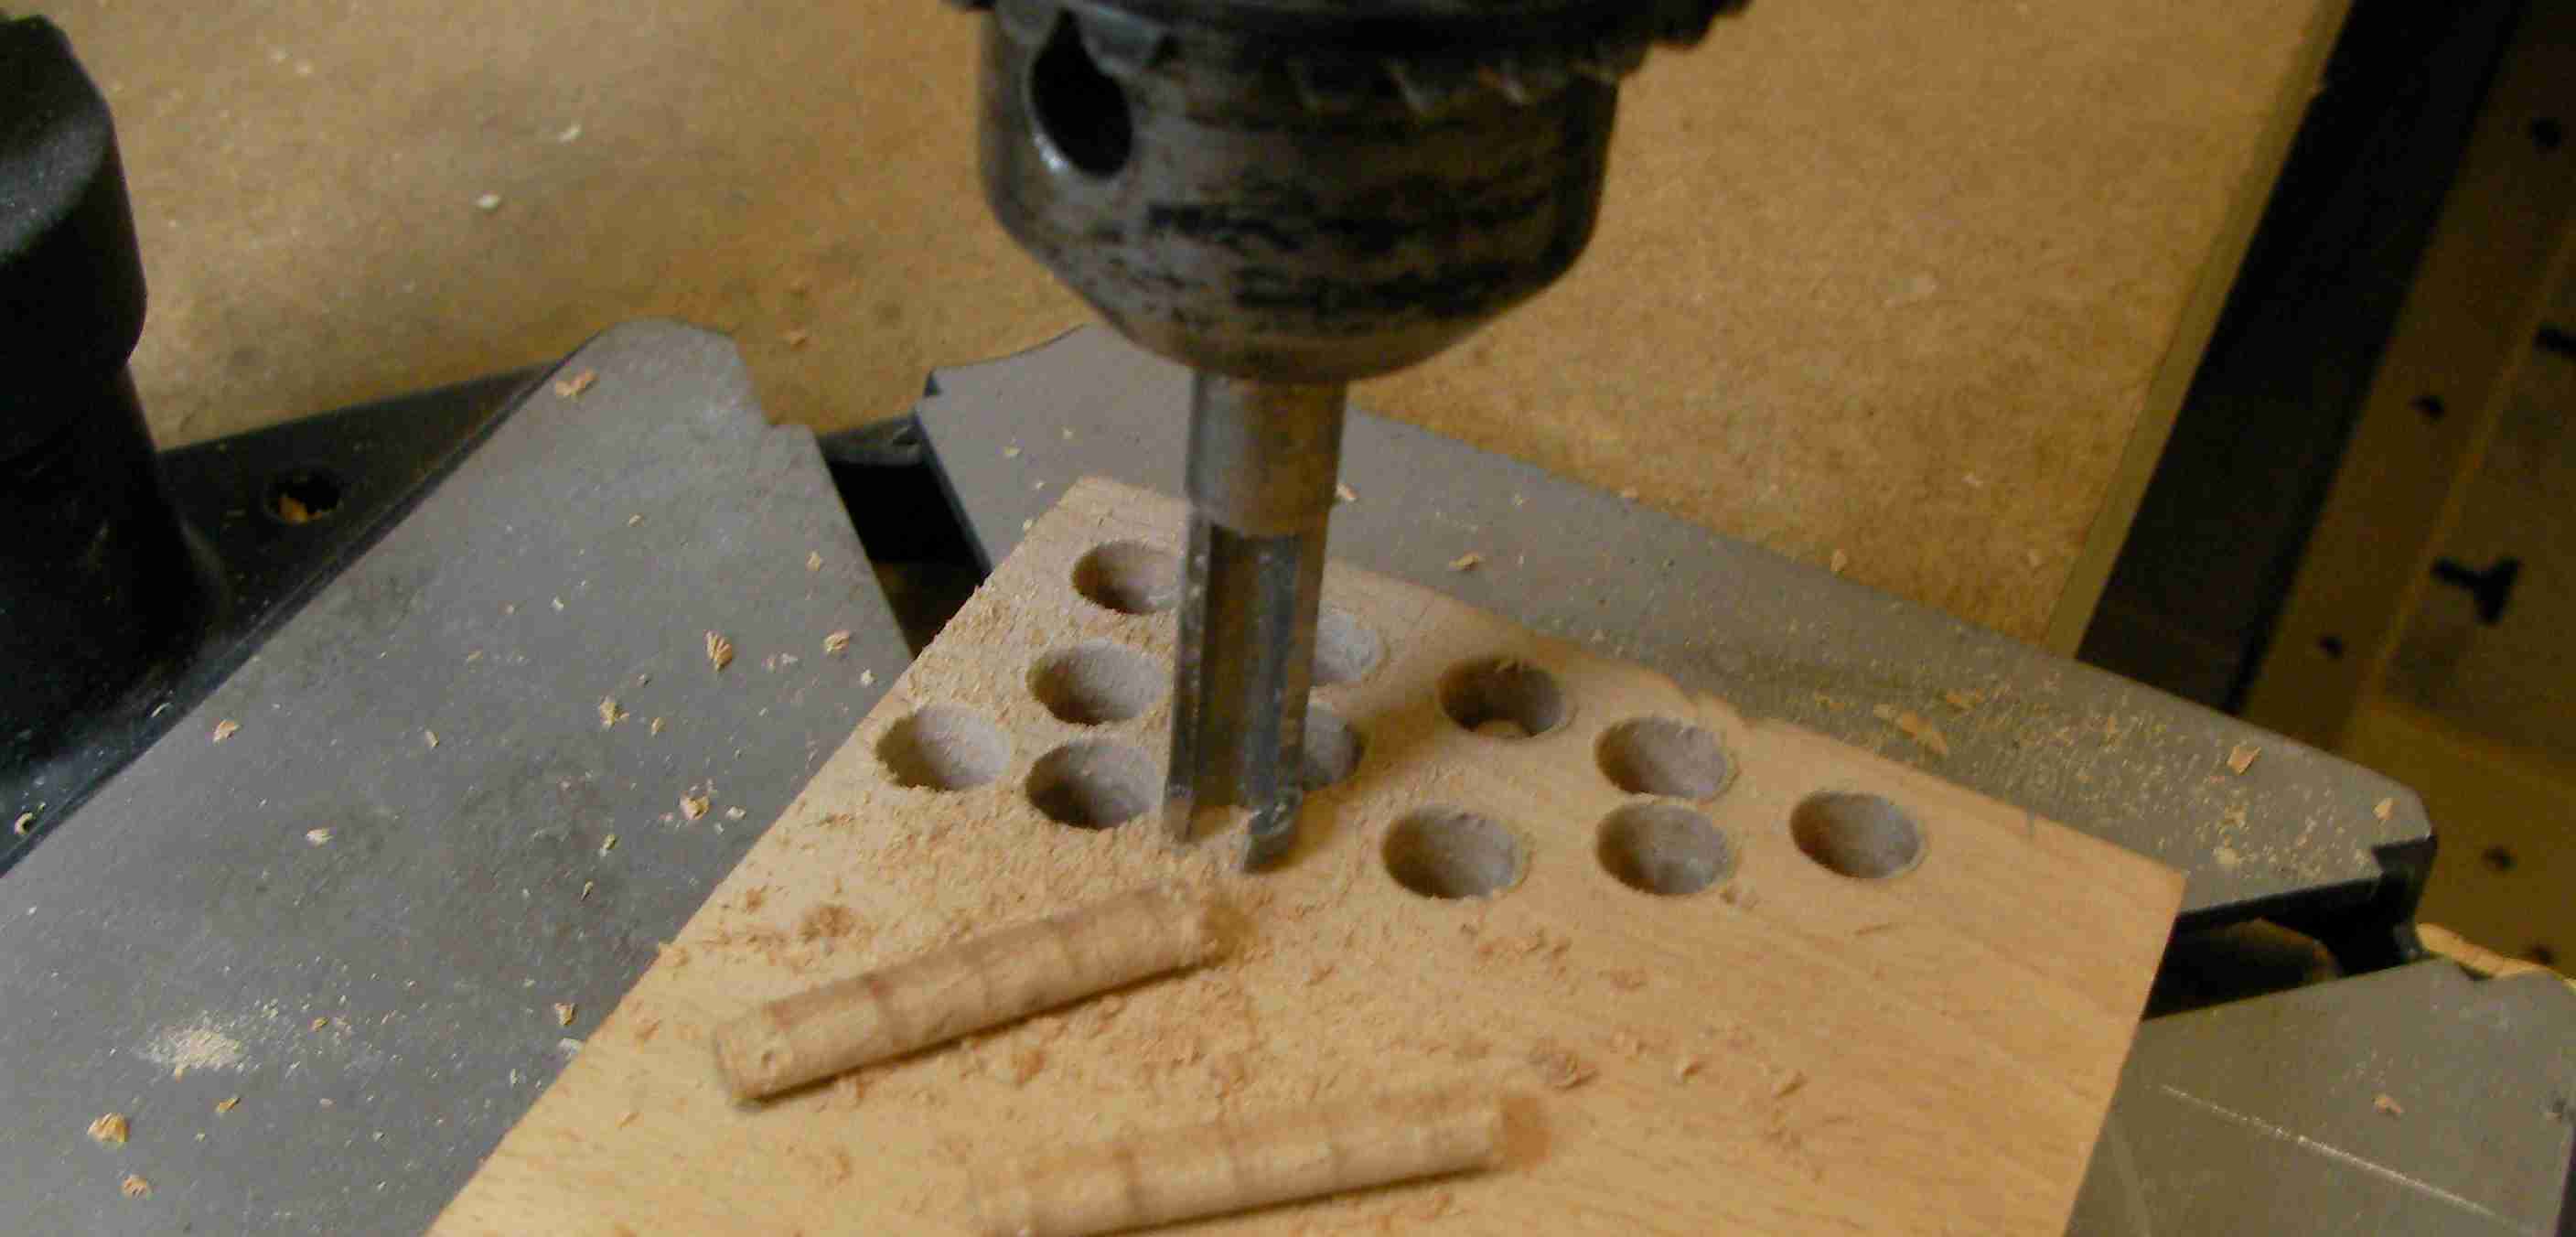
Glue them in the holes and let them dry overnight…
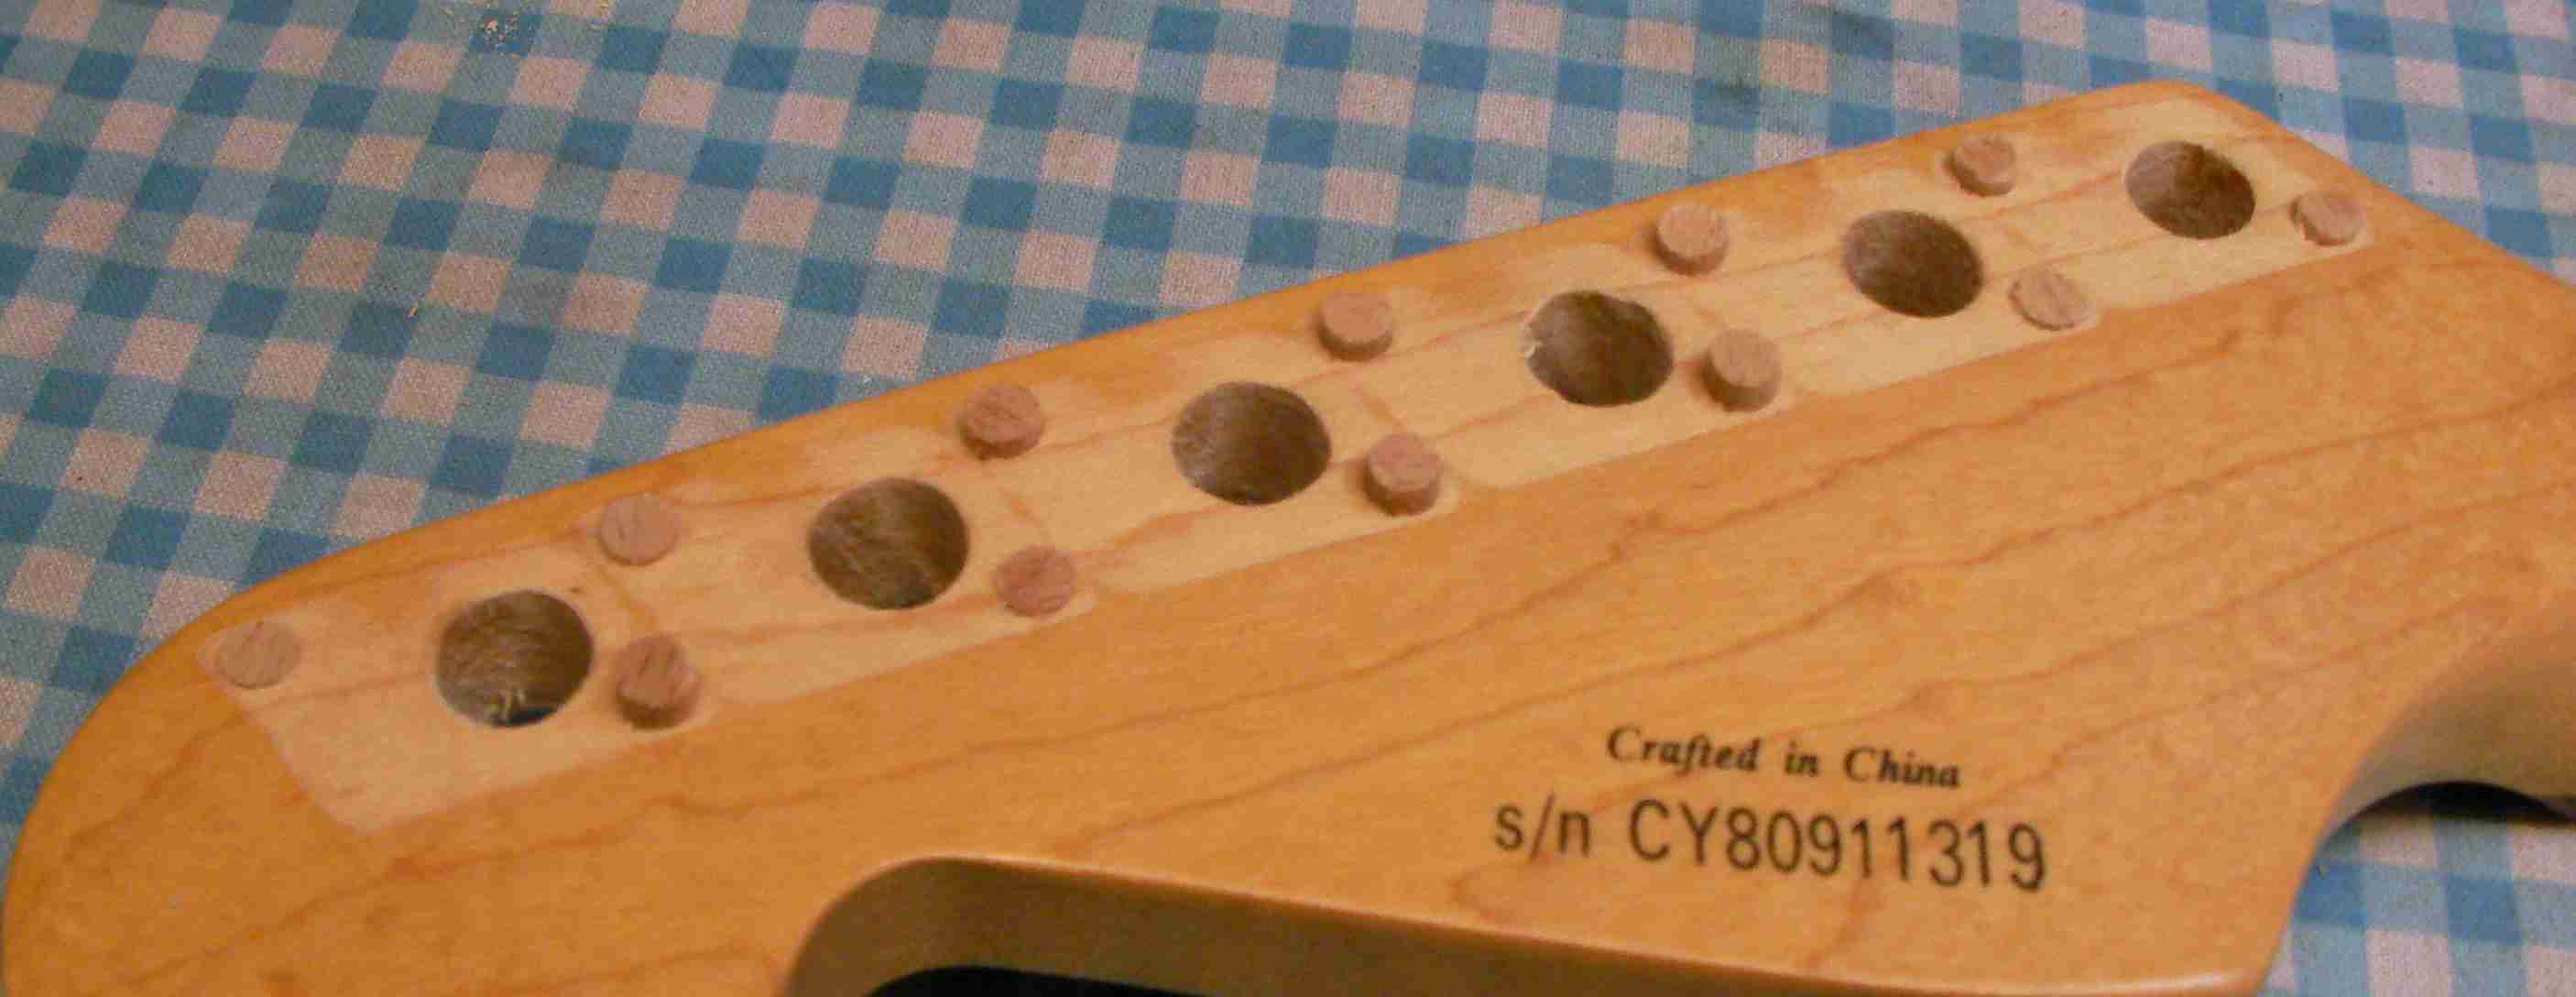
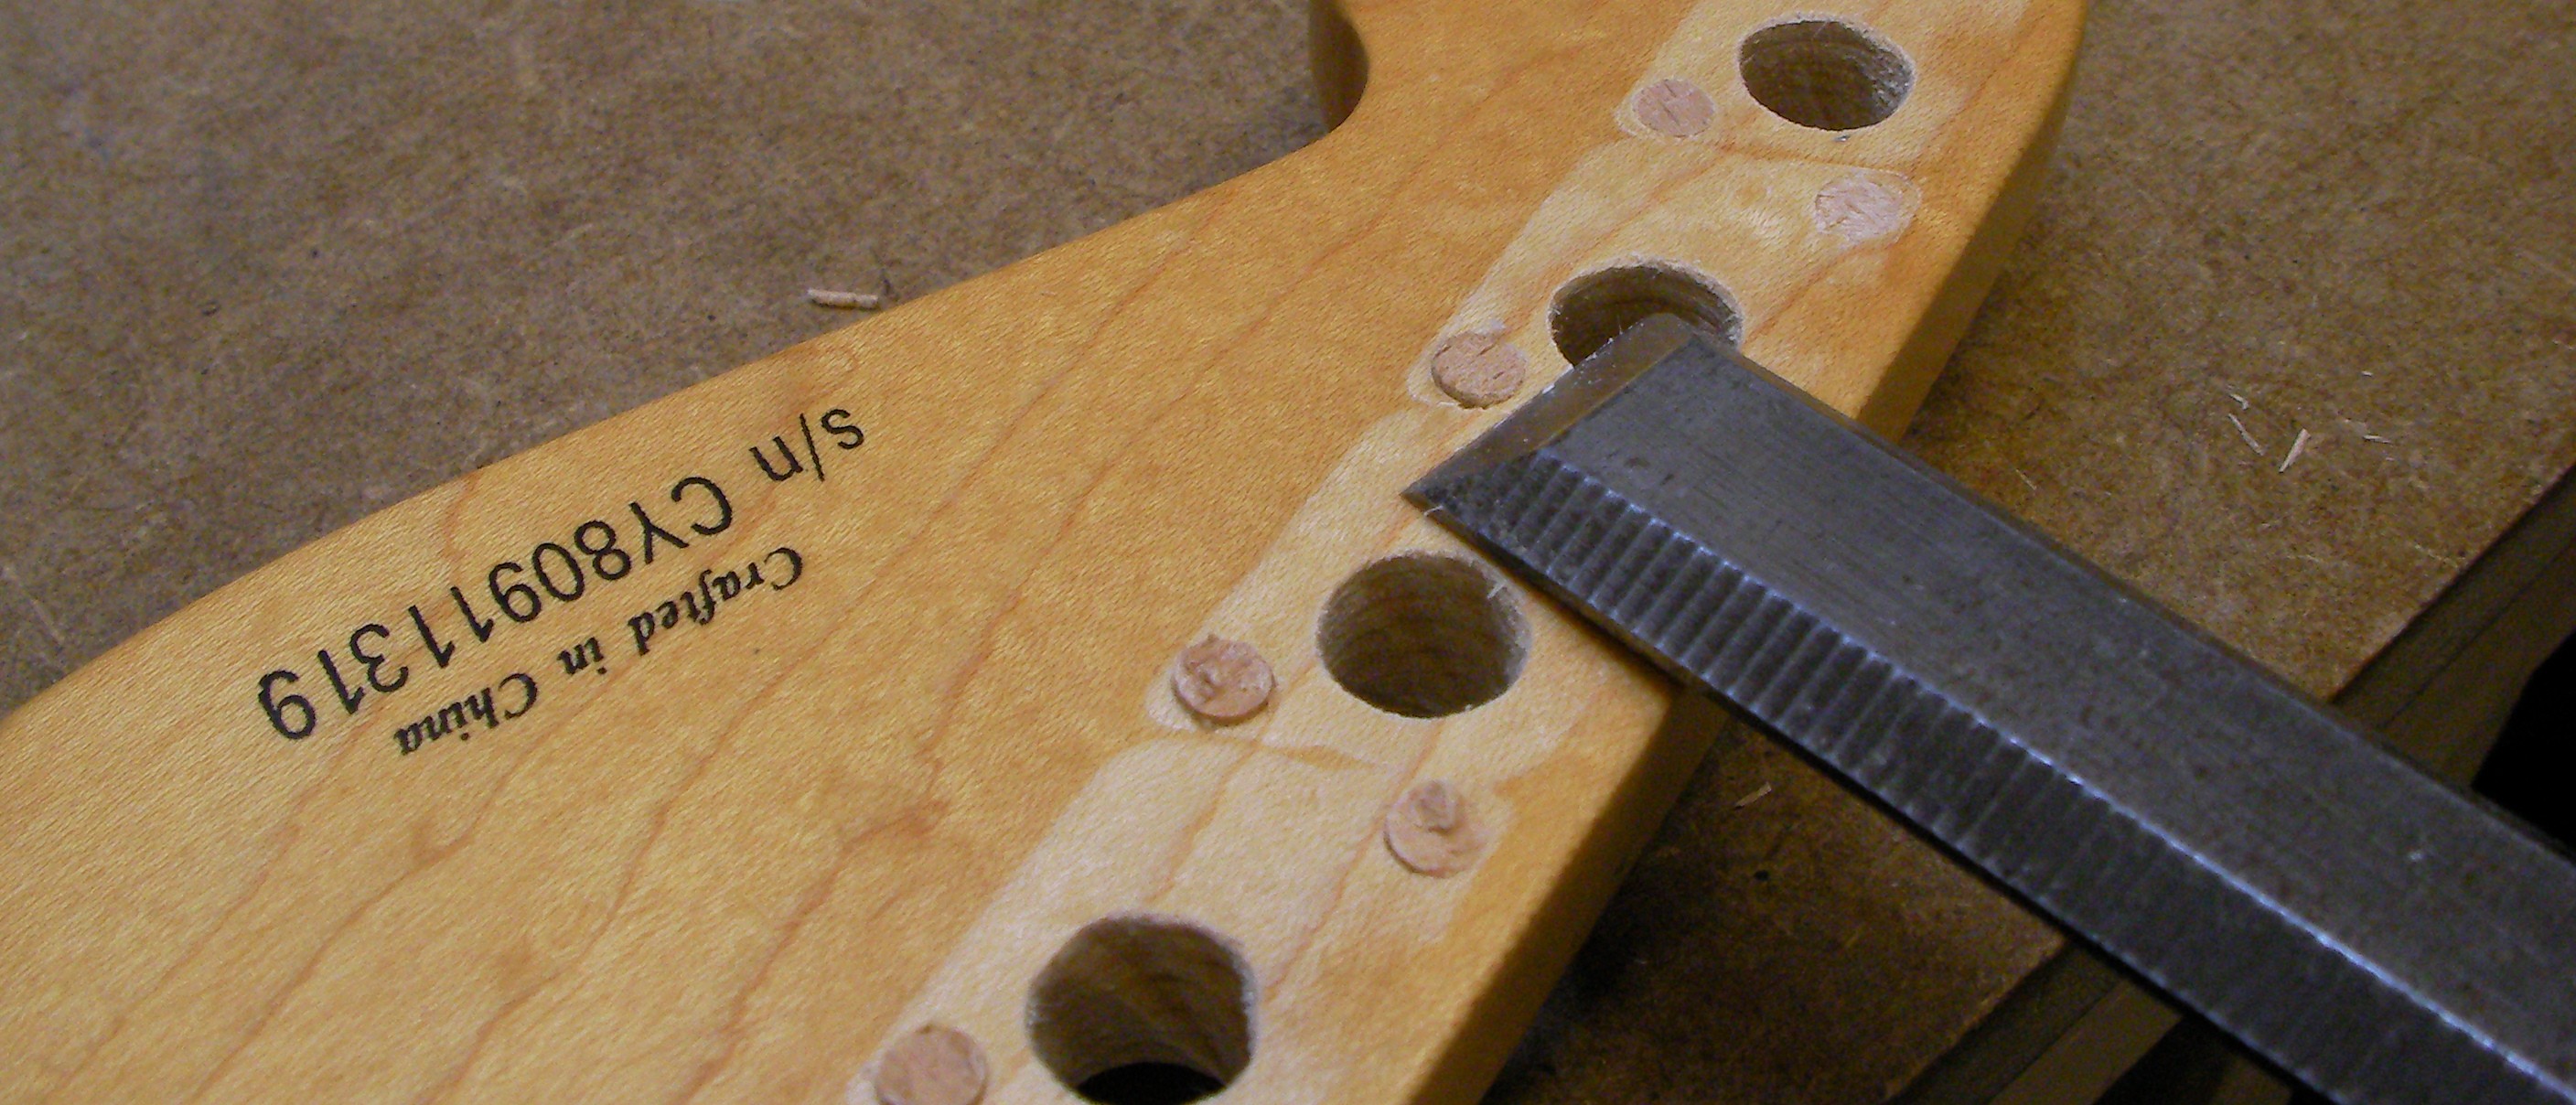
Once they are fully dried carefully cut the tops flush with a sharp chisel..
I’ll fit the new heads once I’ve done the frert-dress..

Before I can dress the frets I need to remove the nut anyway, so while I was there I made the new bone one. Squire nuts are made of plastic so the one sure way of increasing the quality of tone and sustain is have a bone one fitted!
As with many Squires and Fenders the bottom of the nut slot has the same radius as the neck. The simplest way of getting that shape is to use adhesive backed sandpaper on the fretboard…
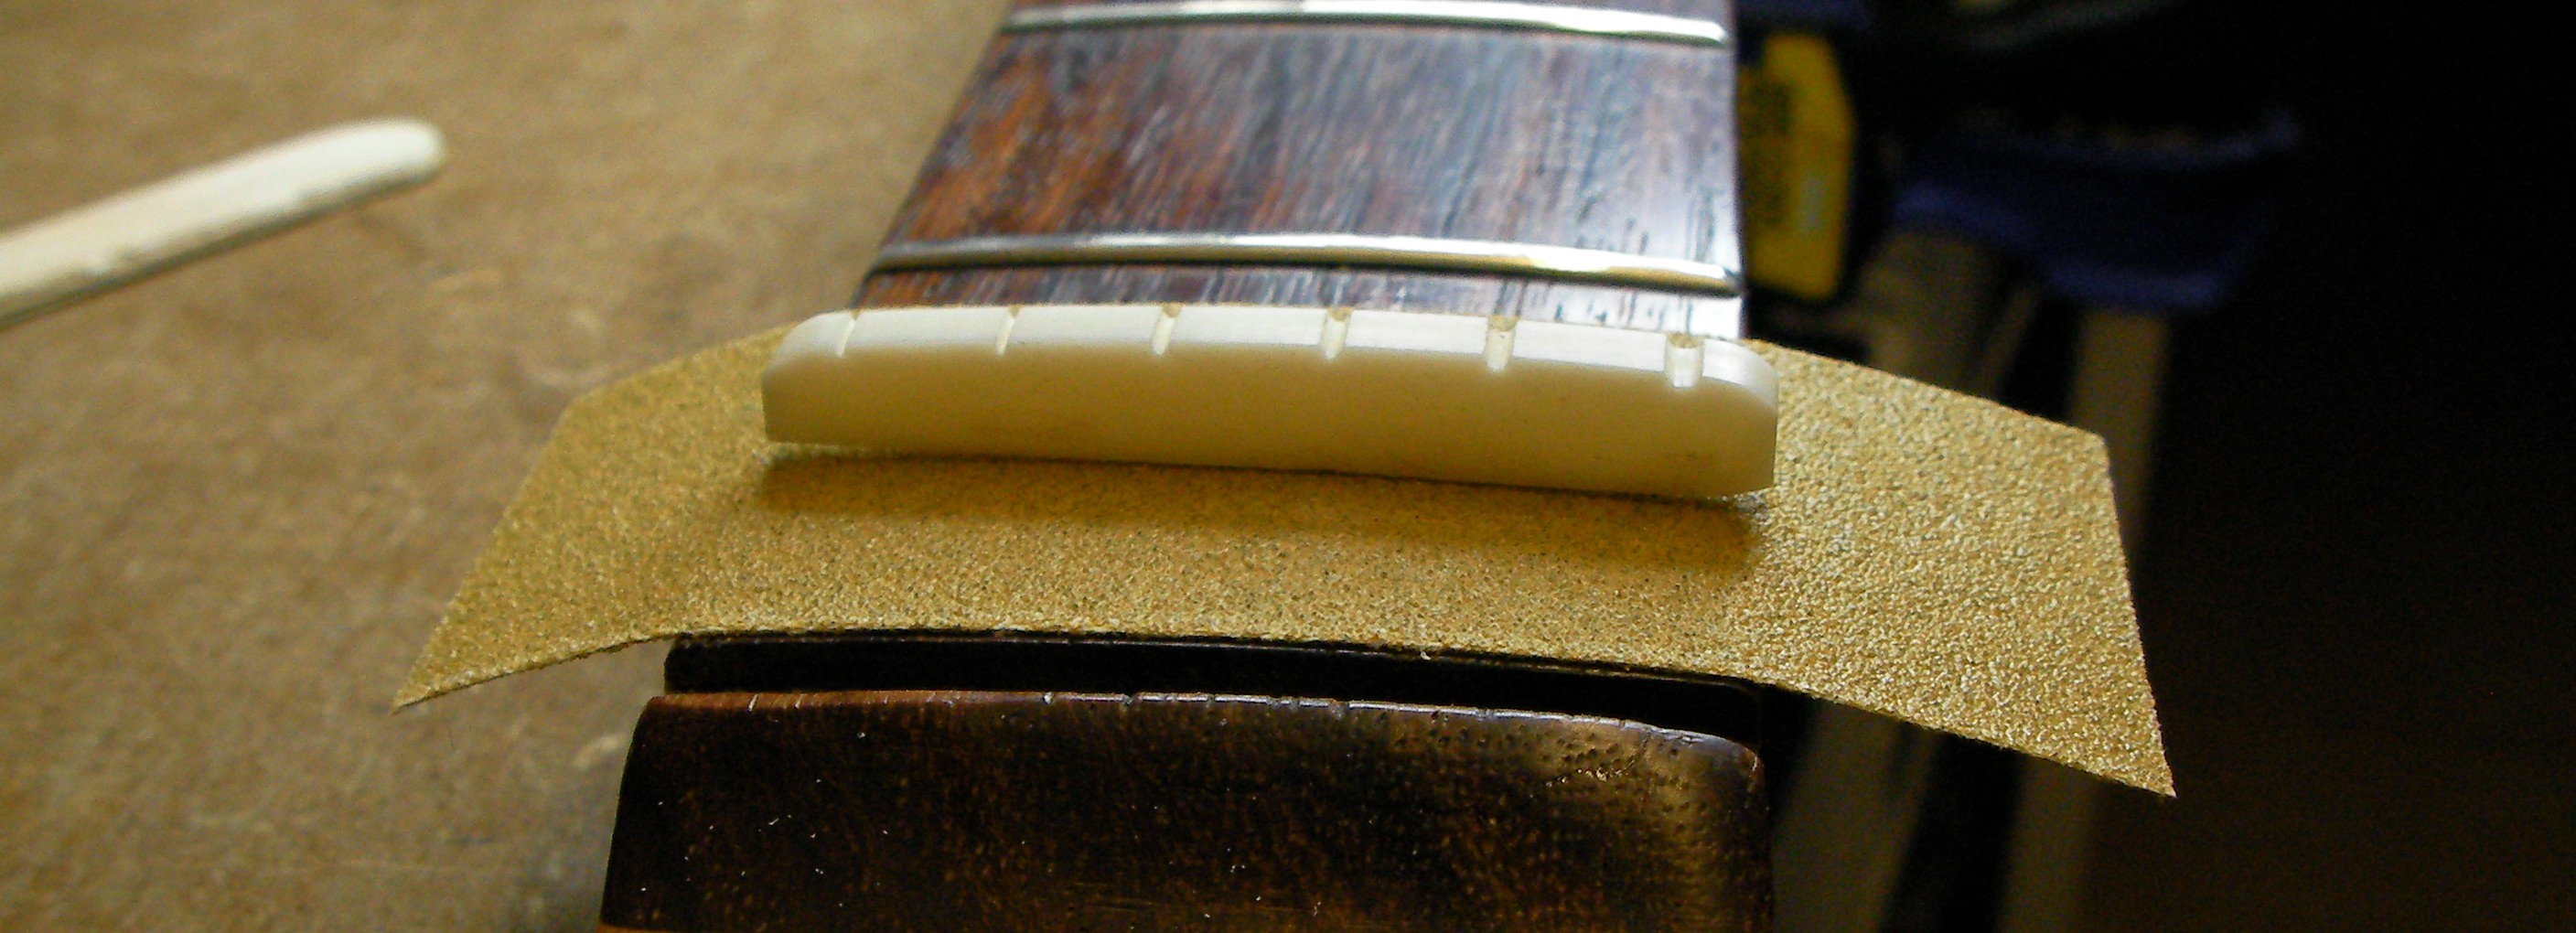
As you can see it doesn’t quite fit, it’s only touching in the middle. The string slots are also not deep enough but the only way of getting that right is with the strings attached.
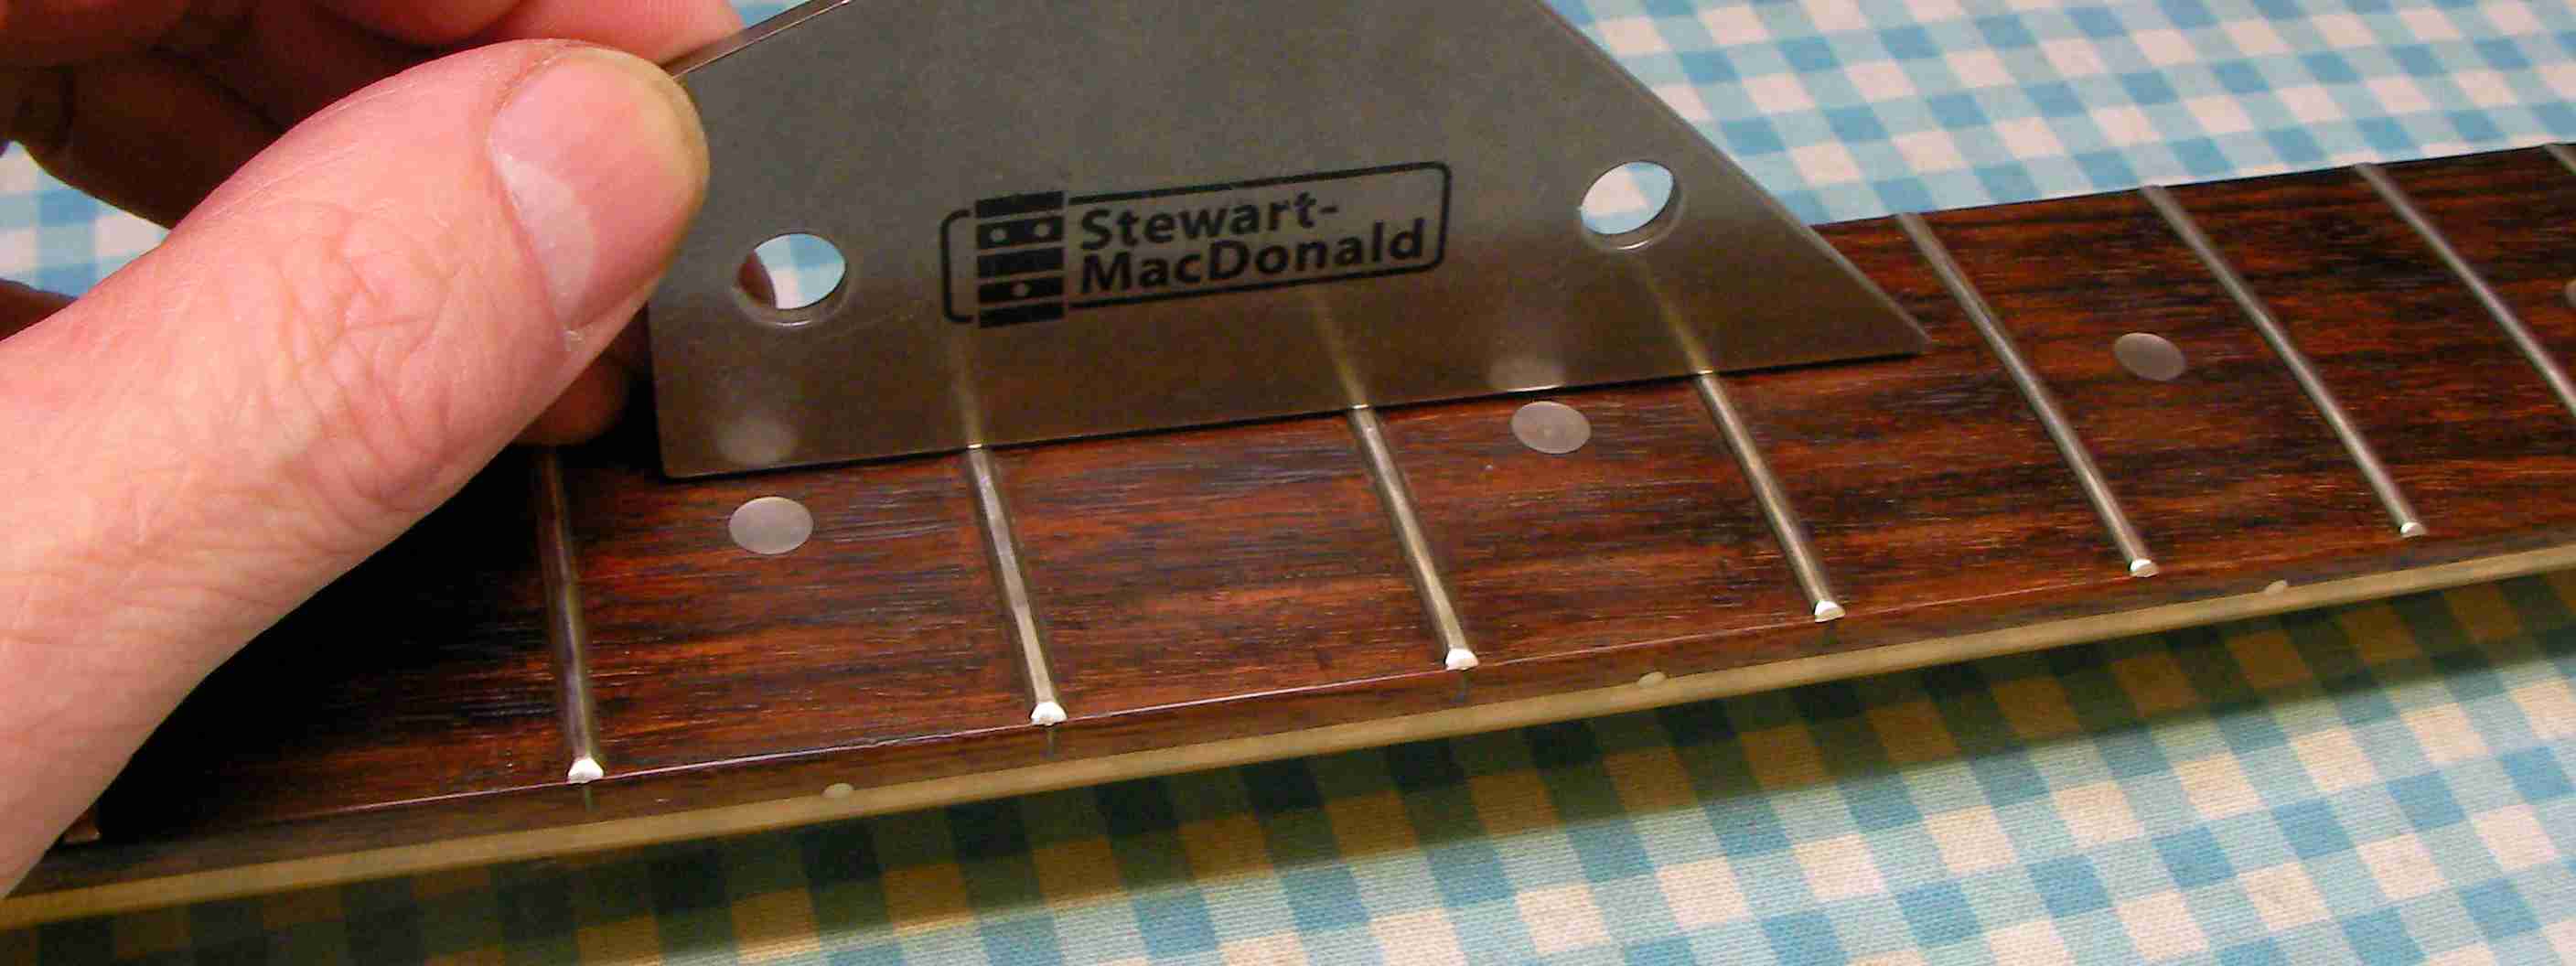
Next then the fret-dress. The most important aspect is to make sure the neck at this point is completely flat, so a quick tweak on the truss-rod…
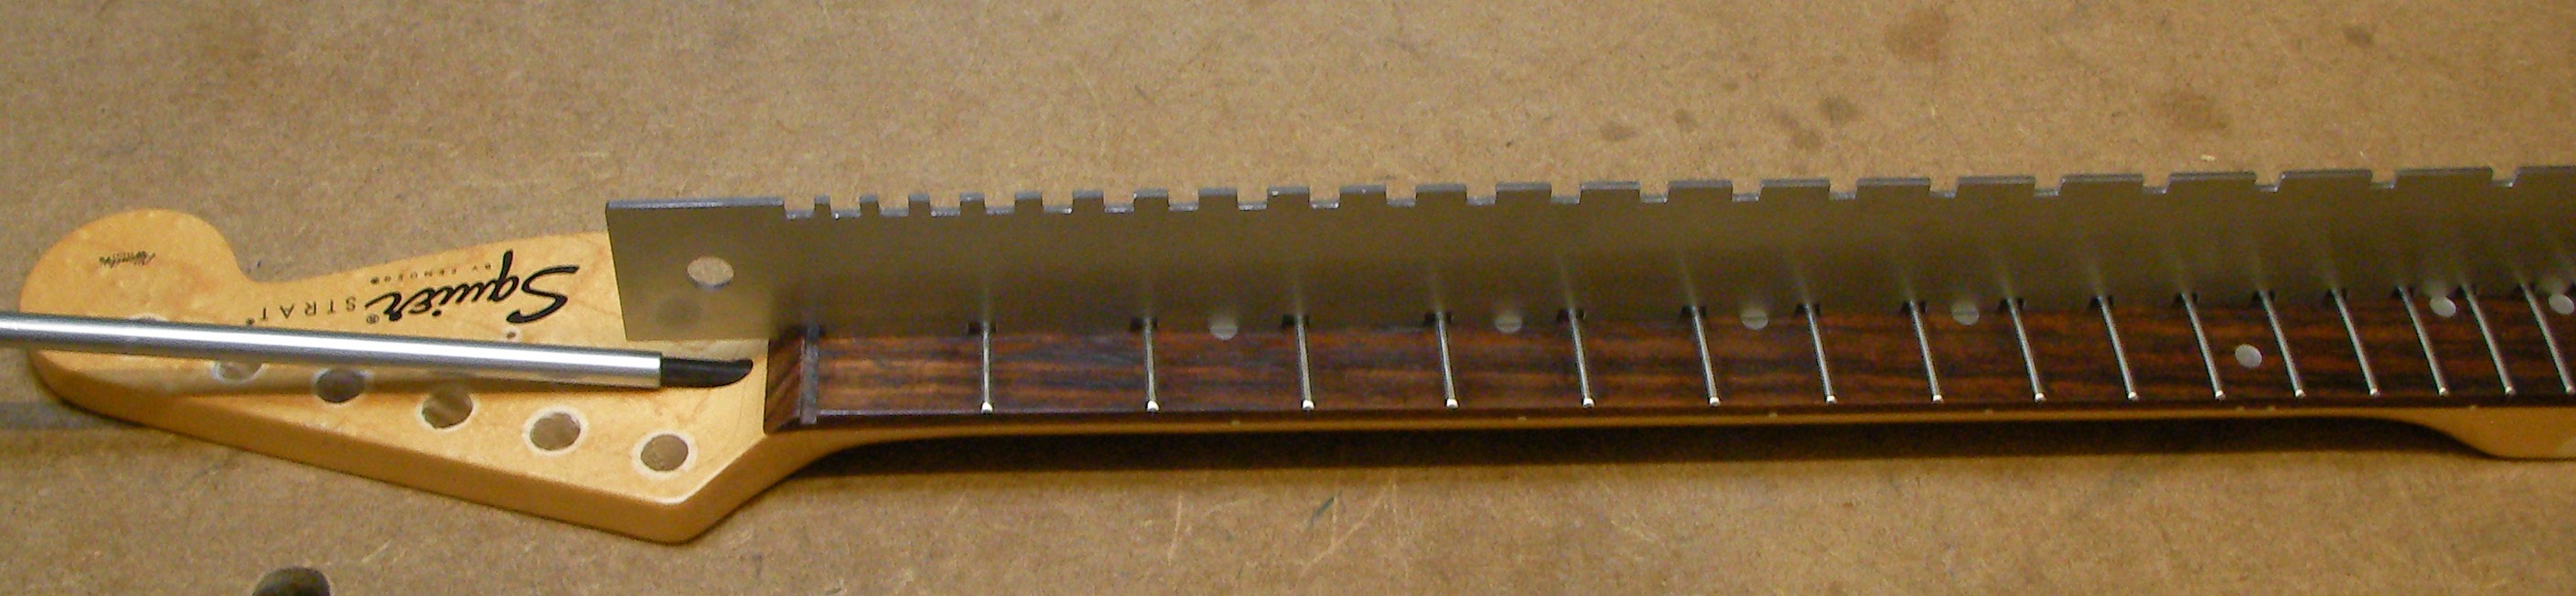
With the fretboard flat, tape it up to protect it and mark the fret tops with a marker pen. The black marker is a good way of telling at a glance where the beam is touching and where the low point are, this is about half way.
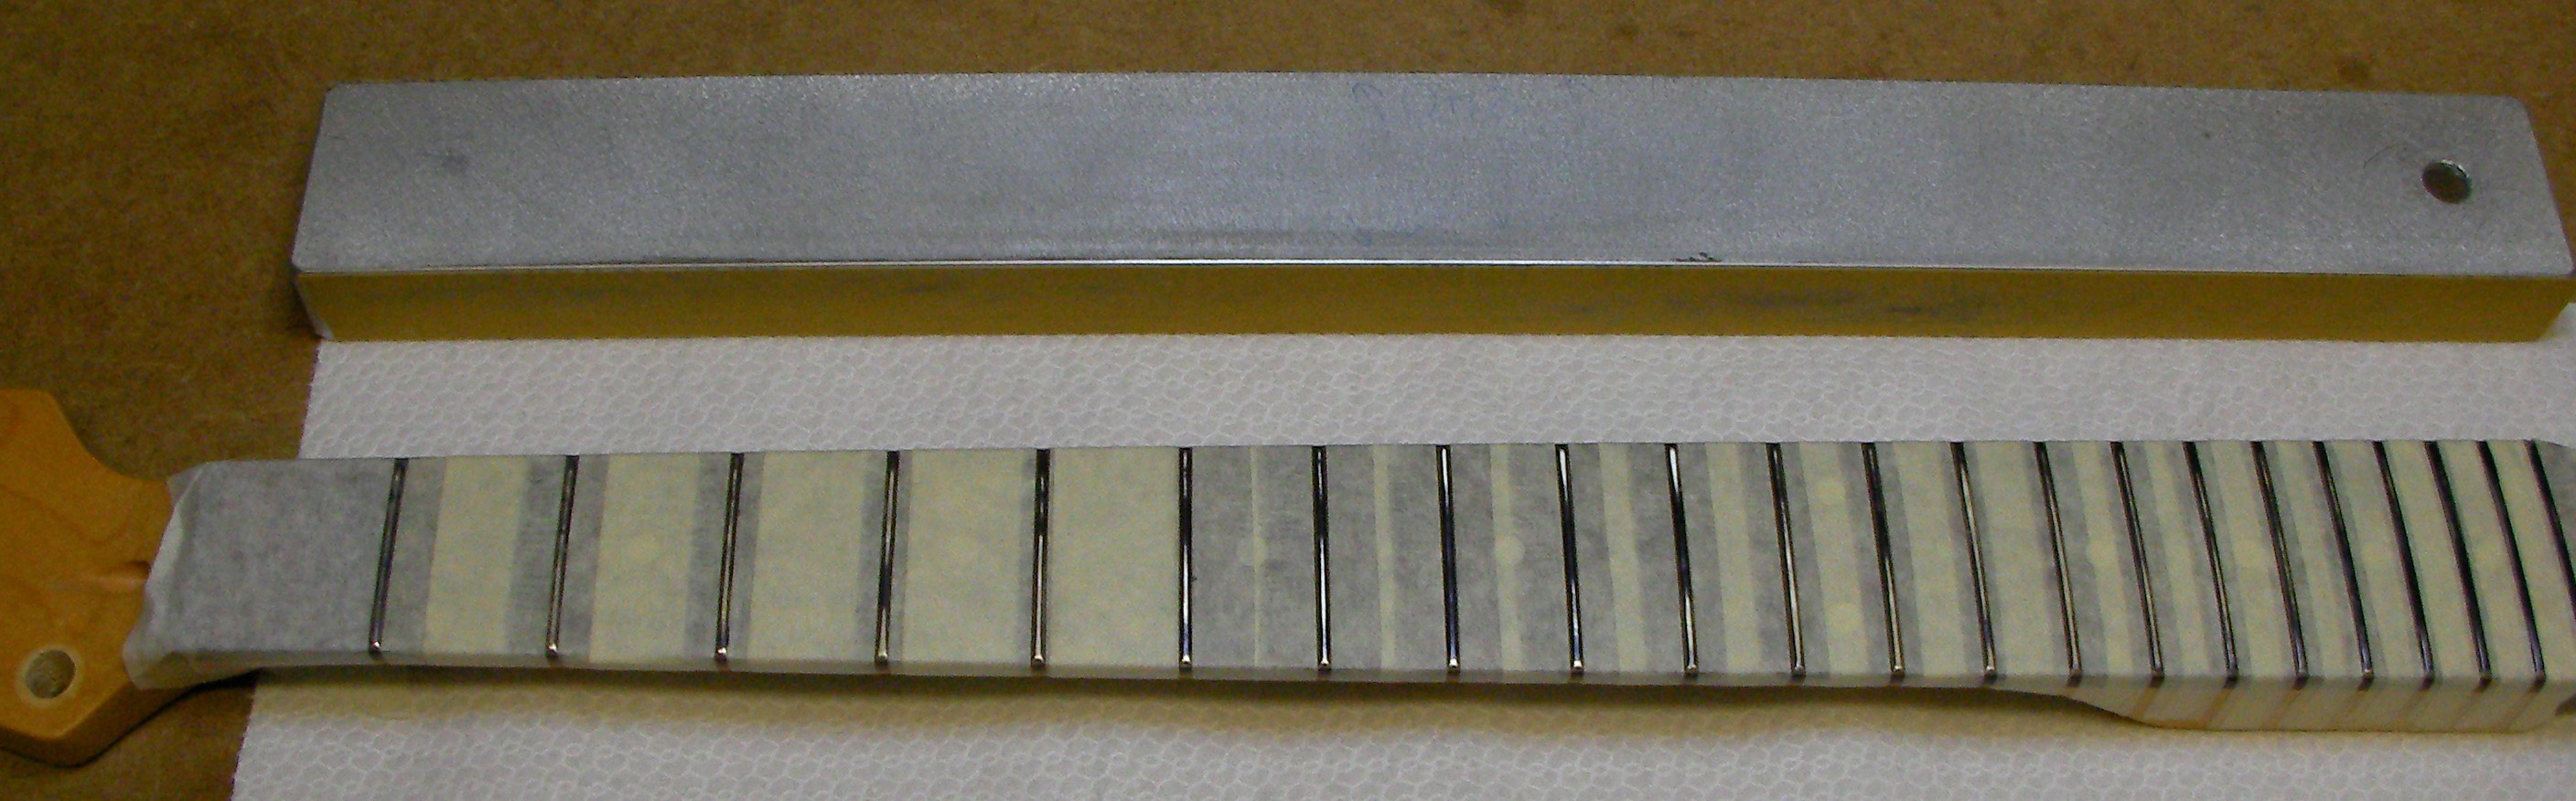
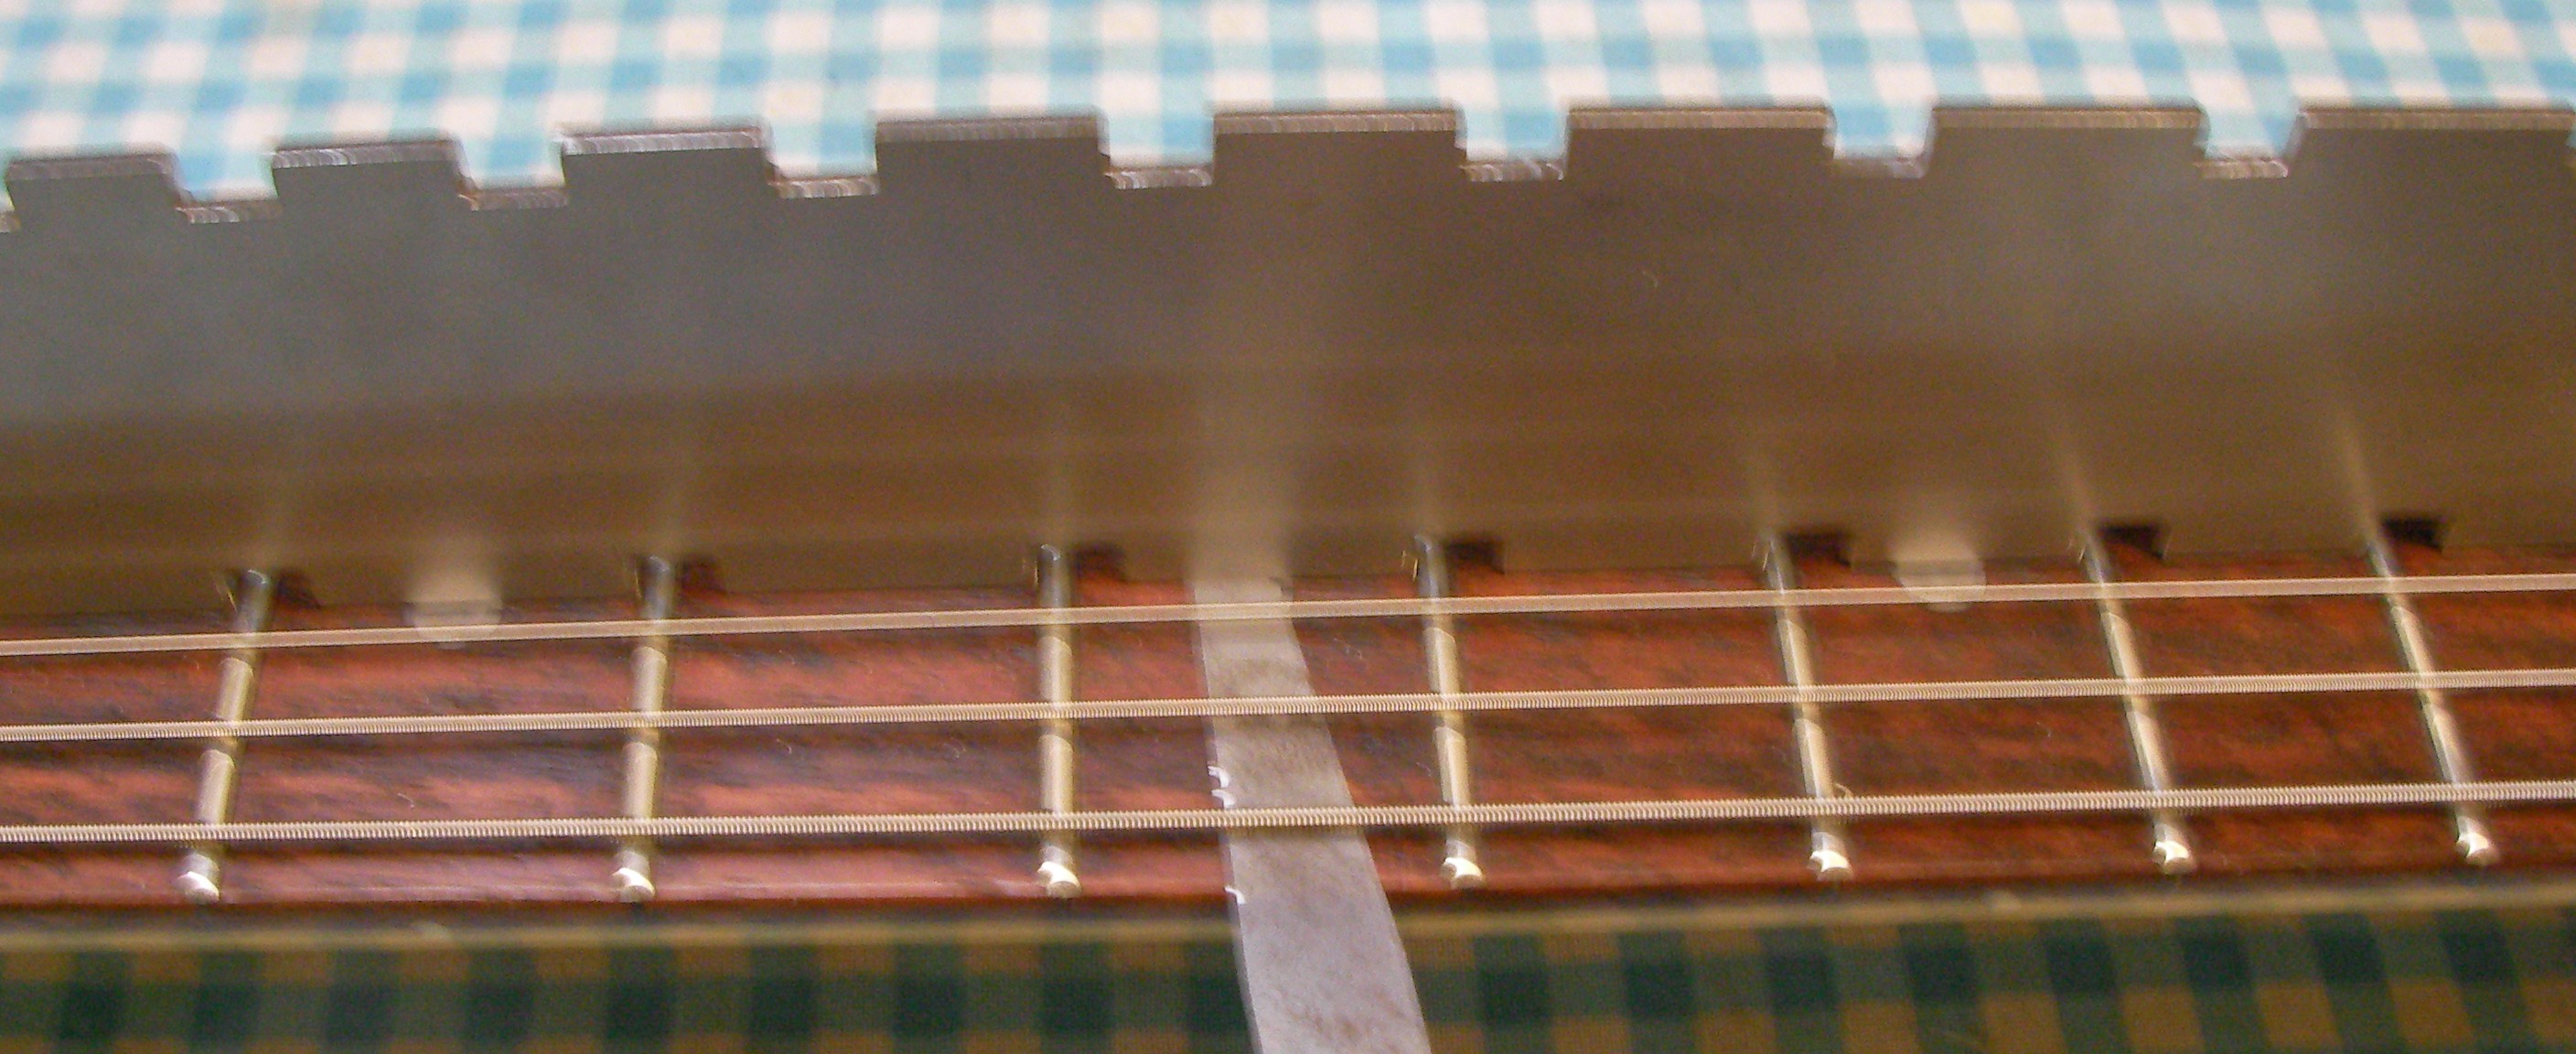
Below is about where I need to stop. The straight edge, with the sandpaper is just starting to touch everywhere, right across each fret….
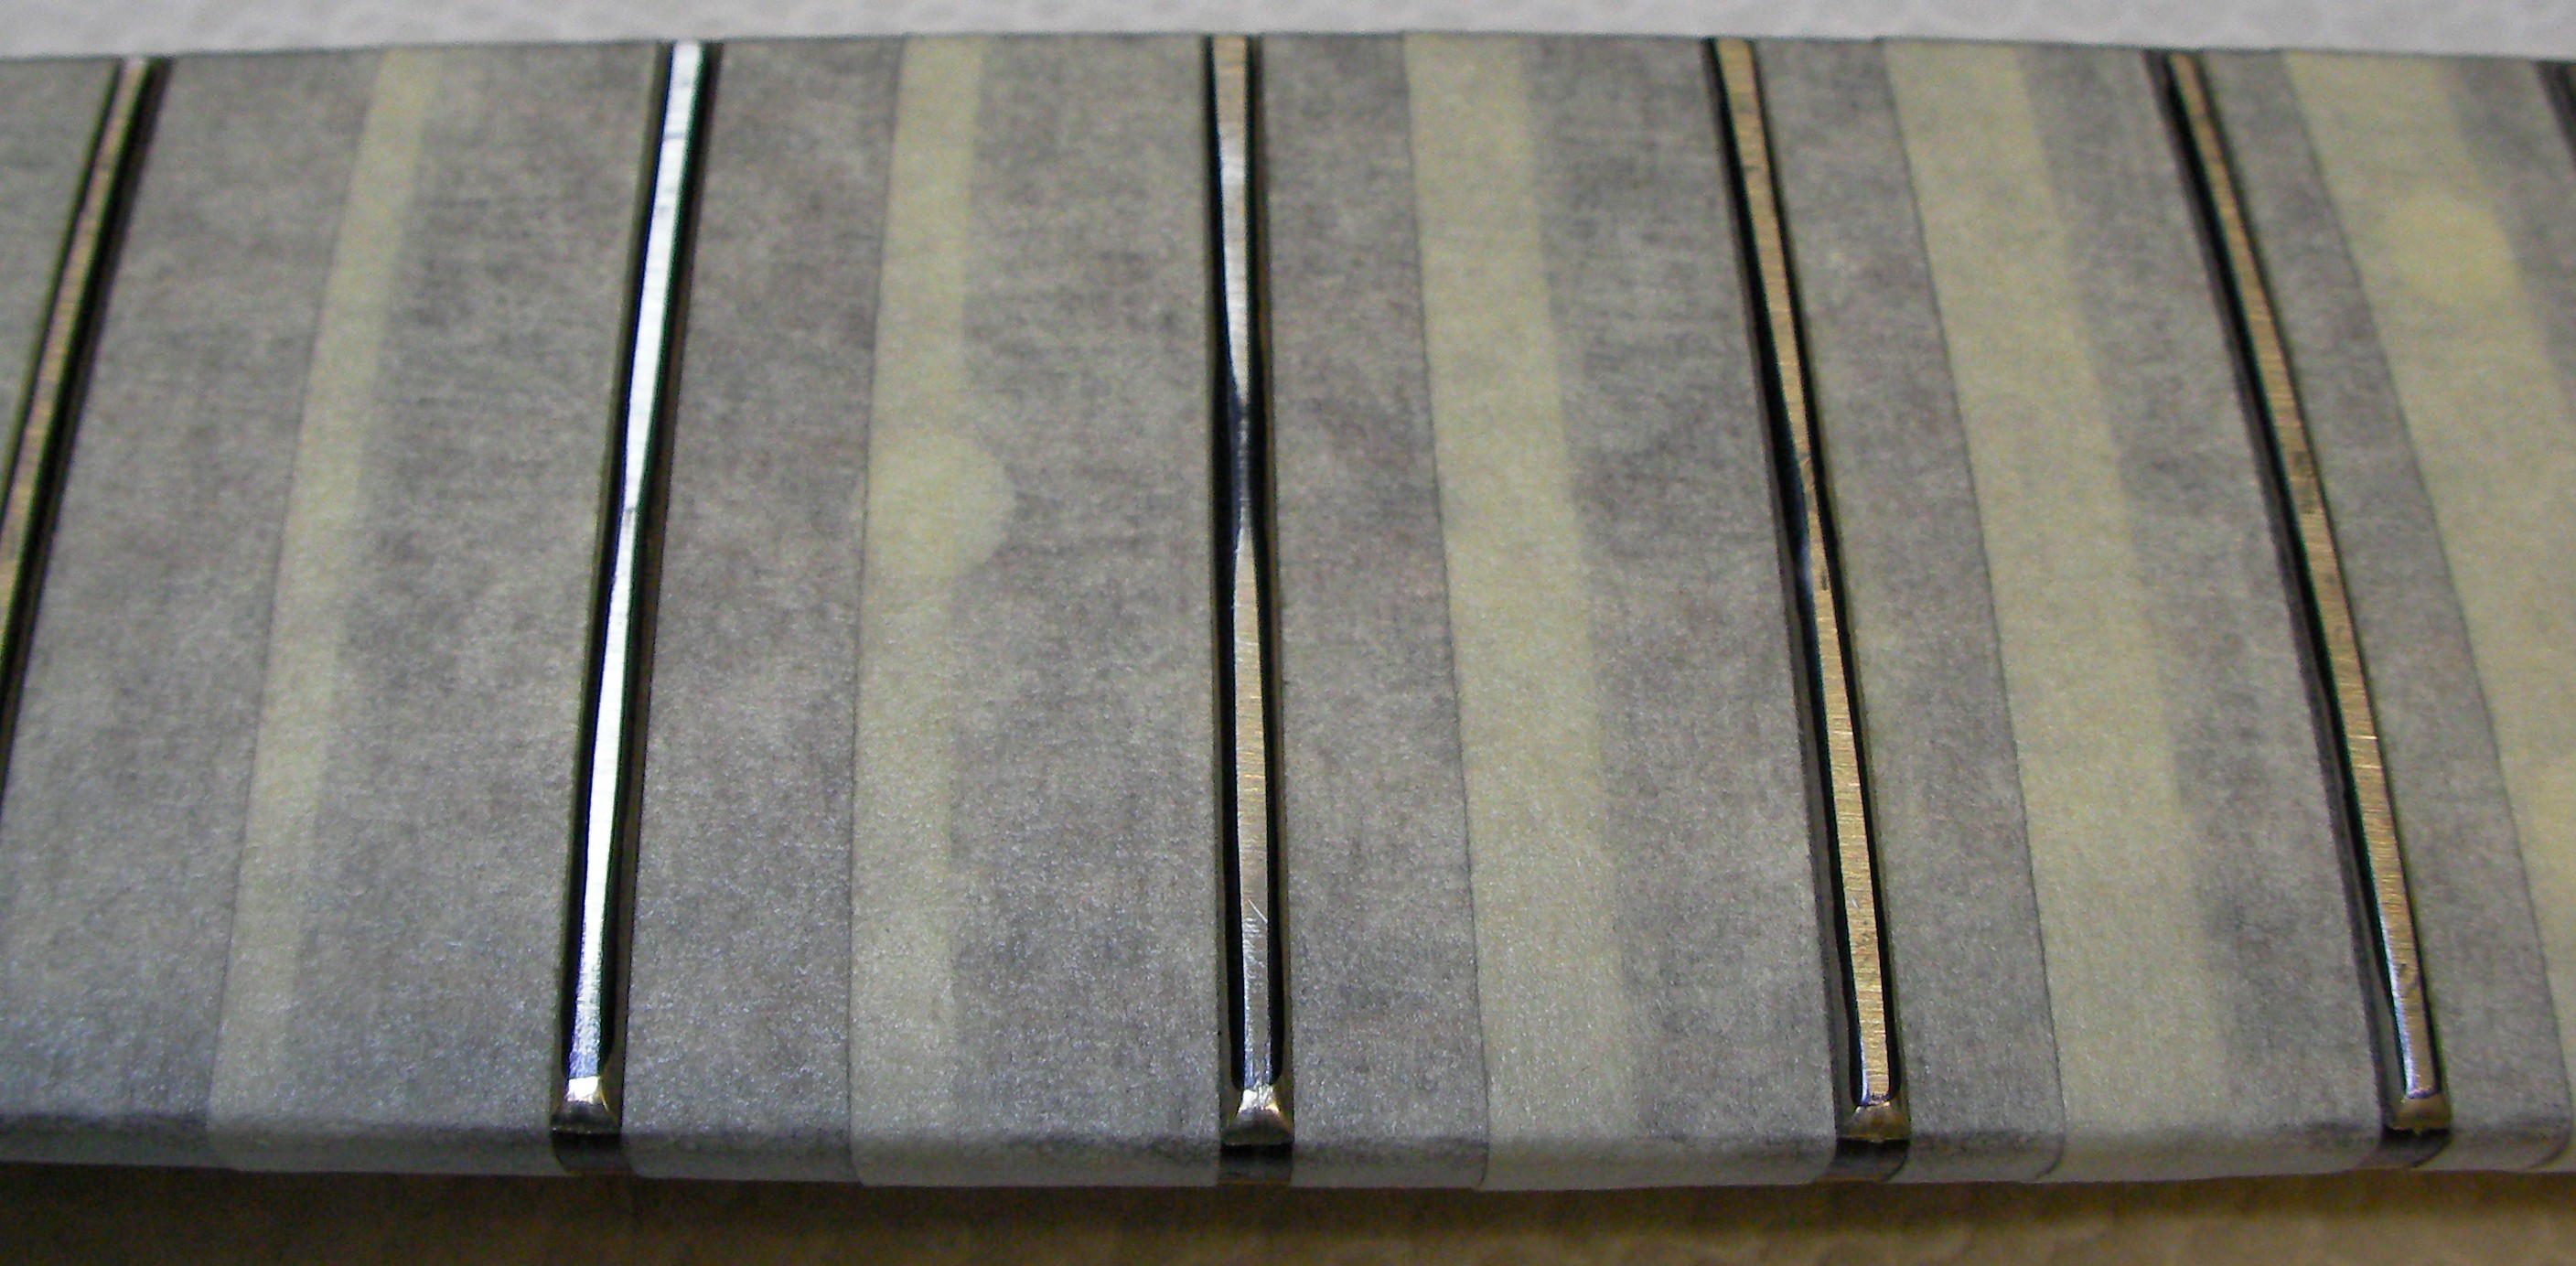
Of course the trouble is some of the frets are now this shape…
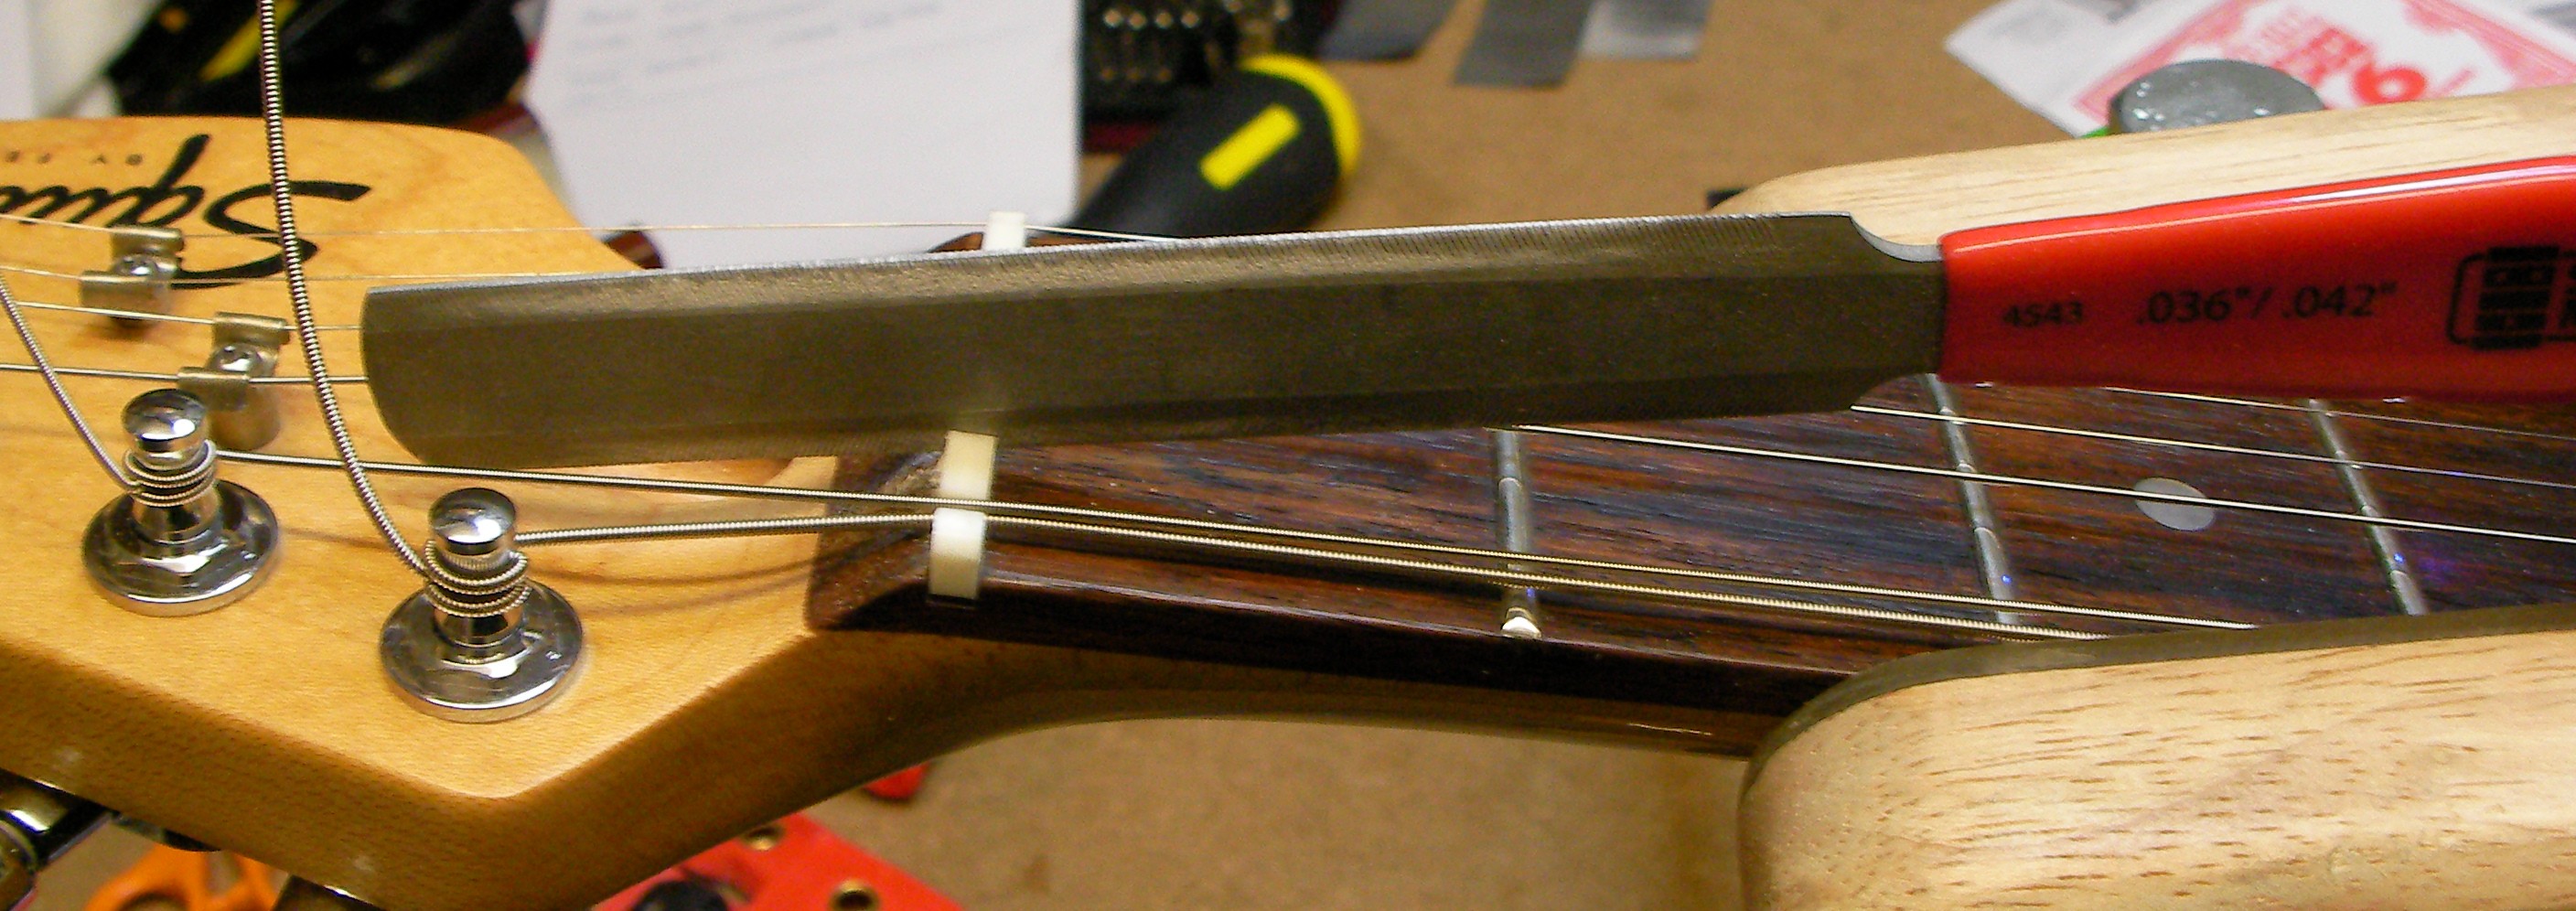
 Not good, so I now need to re-shape each fret with a fret file to re-crown the tops..
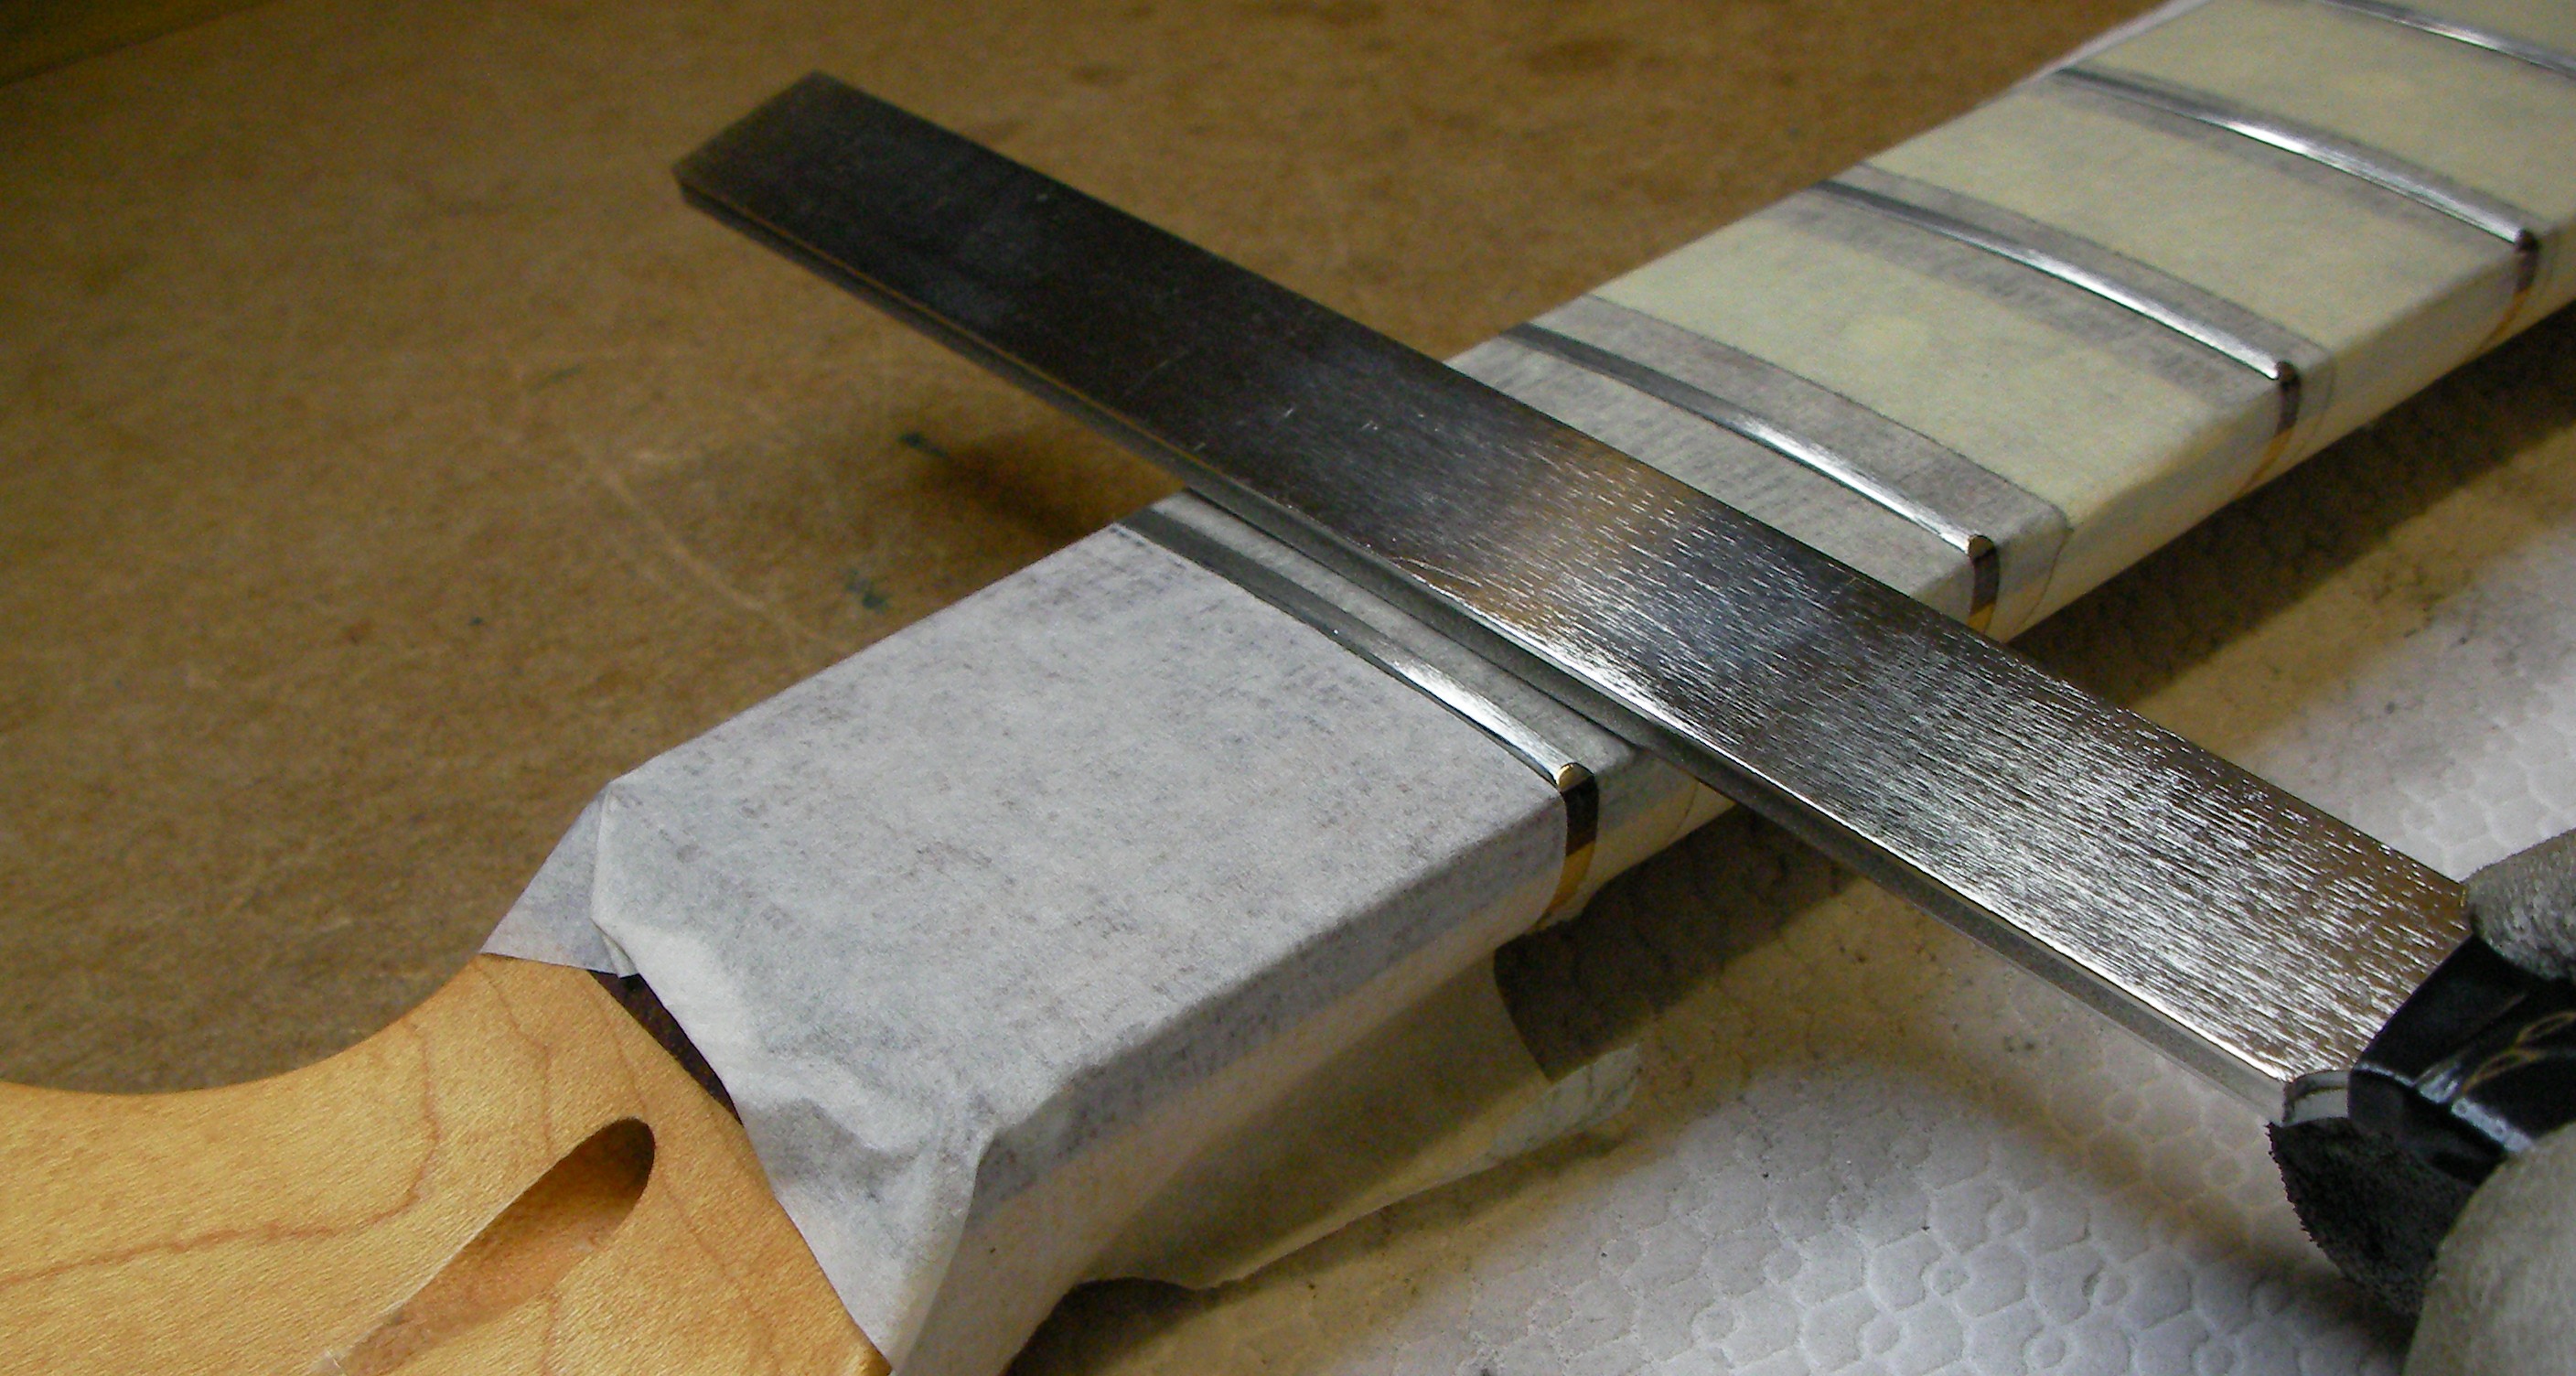
The file is the narrow edge. What I aim to do is file each fret so that the top is round like this….
 That’s why a fret dress takes so long. To manually file 23 or 24 frets by hand making sure I don’t take anything off the top of the fret. You can tell a fret dress that’s been rushed when they haven’t bothered to re shape each one and the tops are all flat. The problem with that is the effect it will have on the intonation.
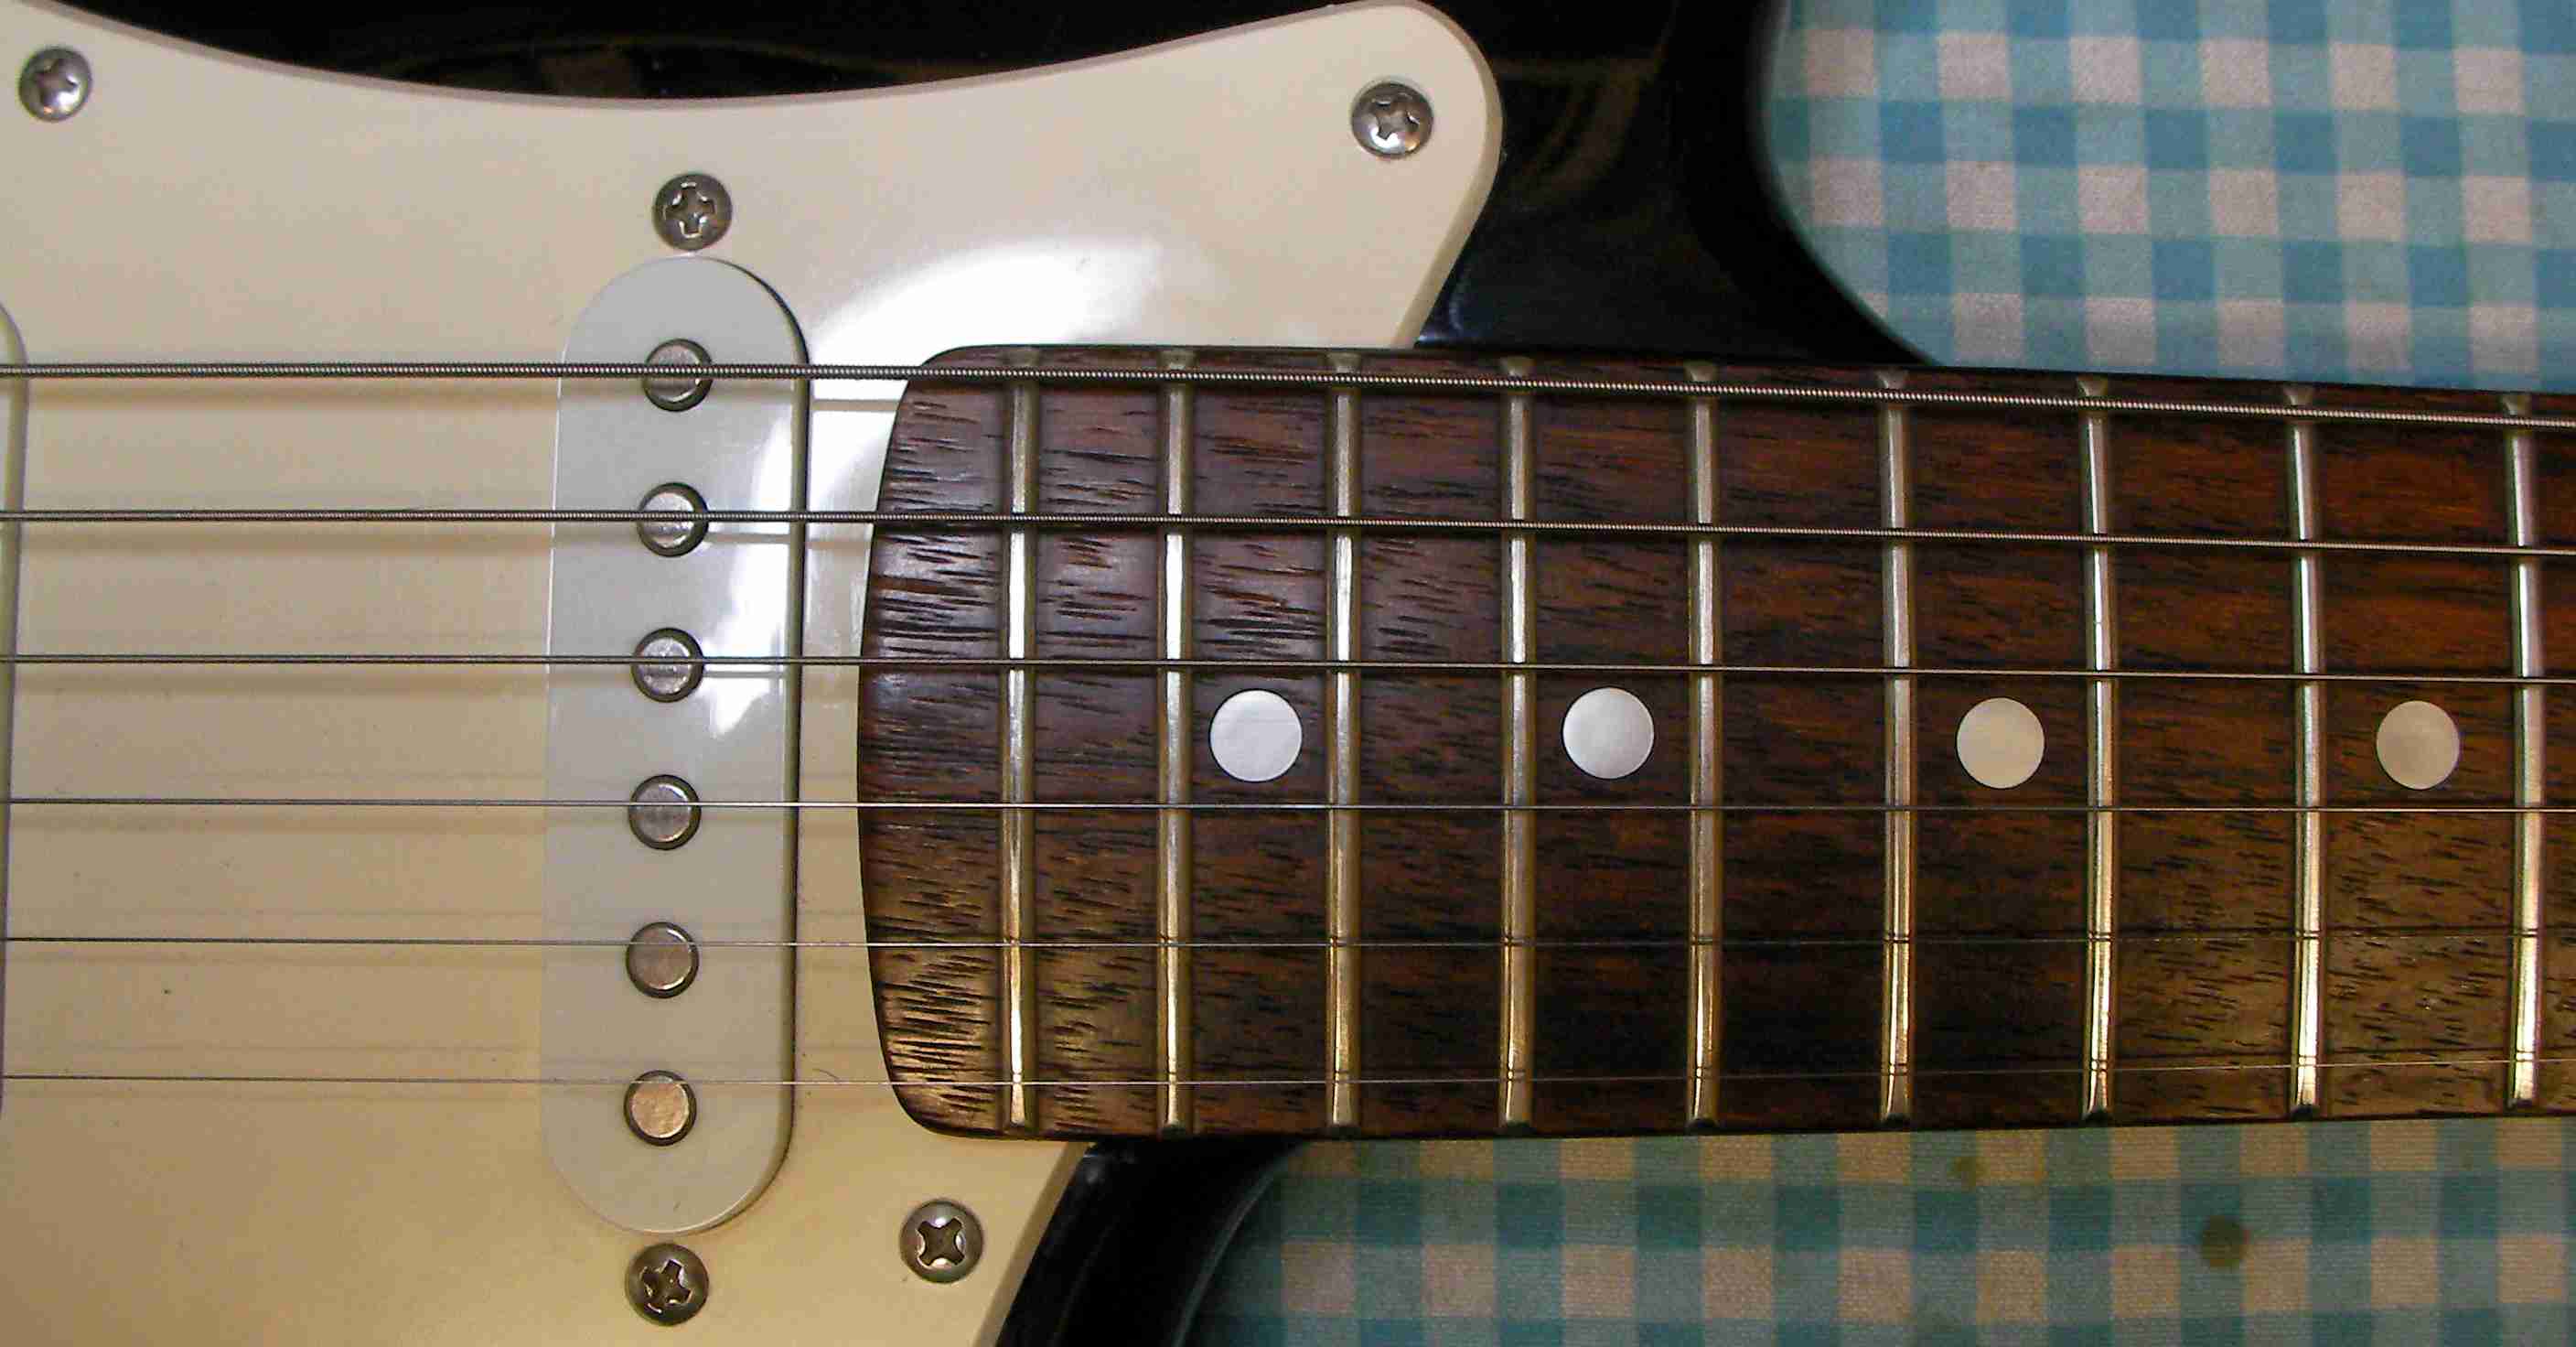
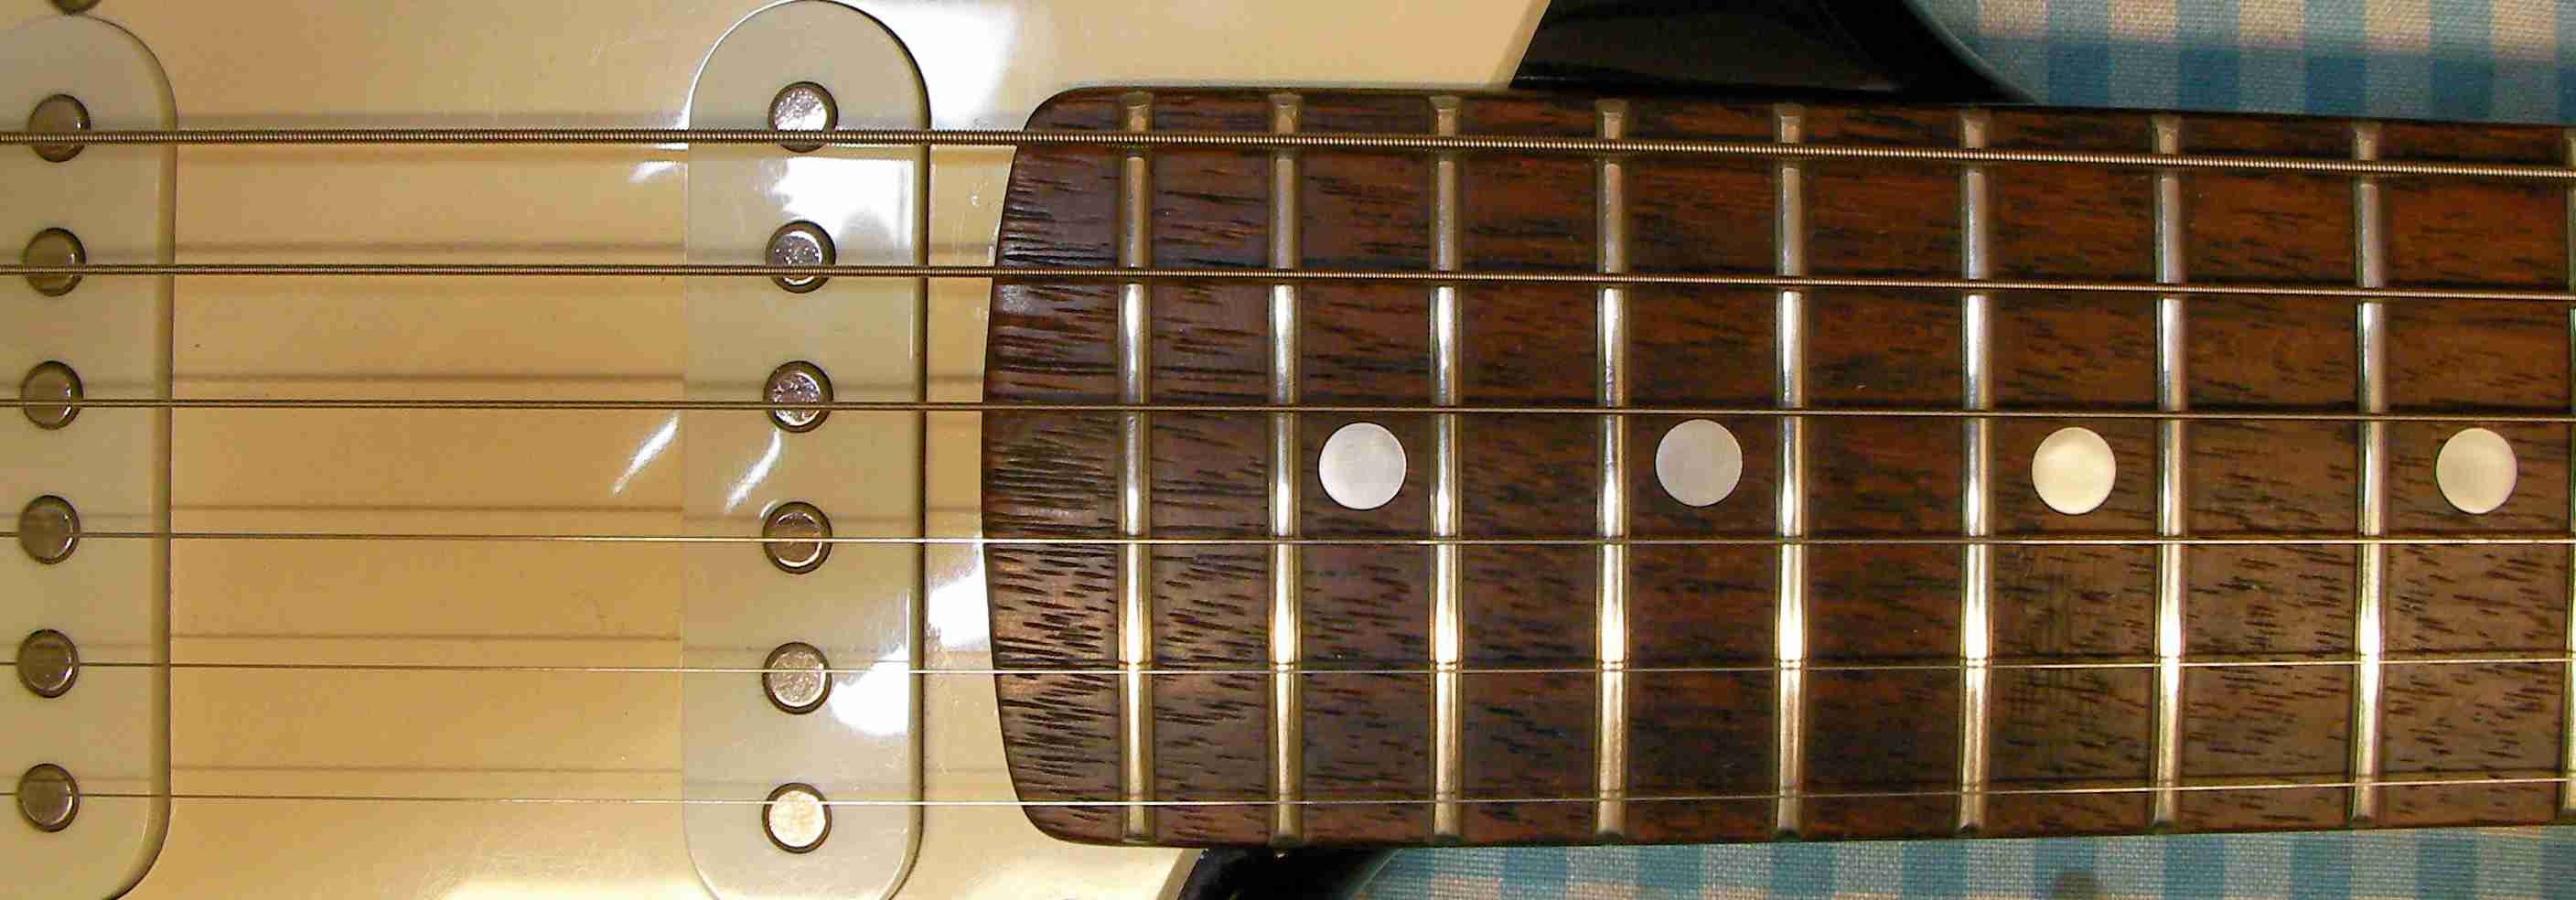
Anyway once that’s done each fret needs to be polished with 4 different grades of micro-cloth to give it a proper shine..

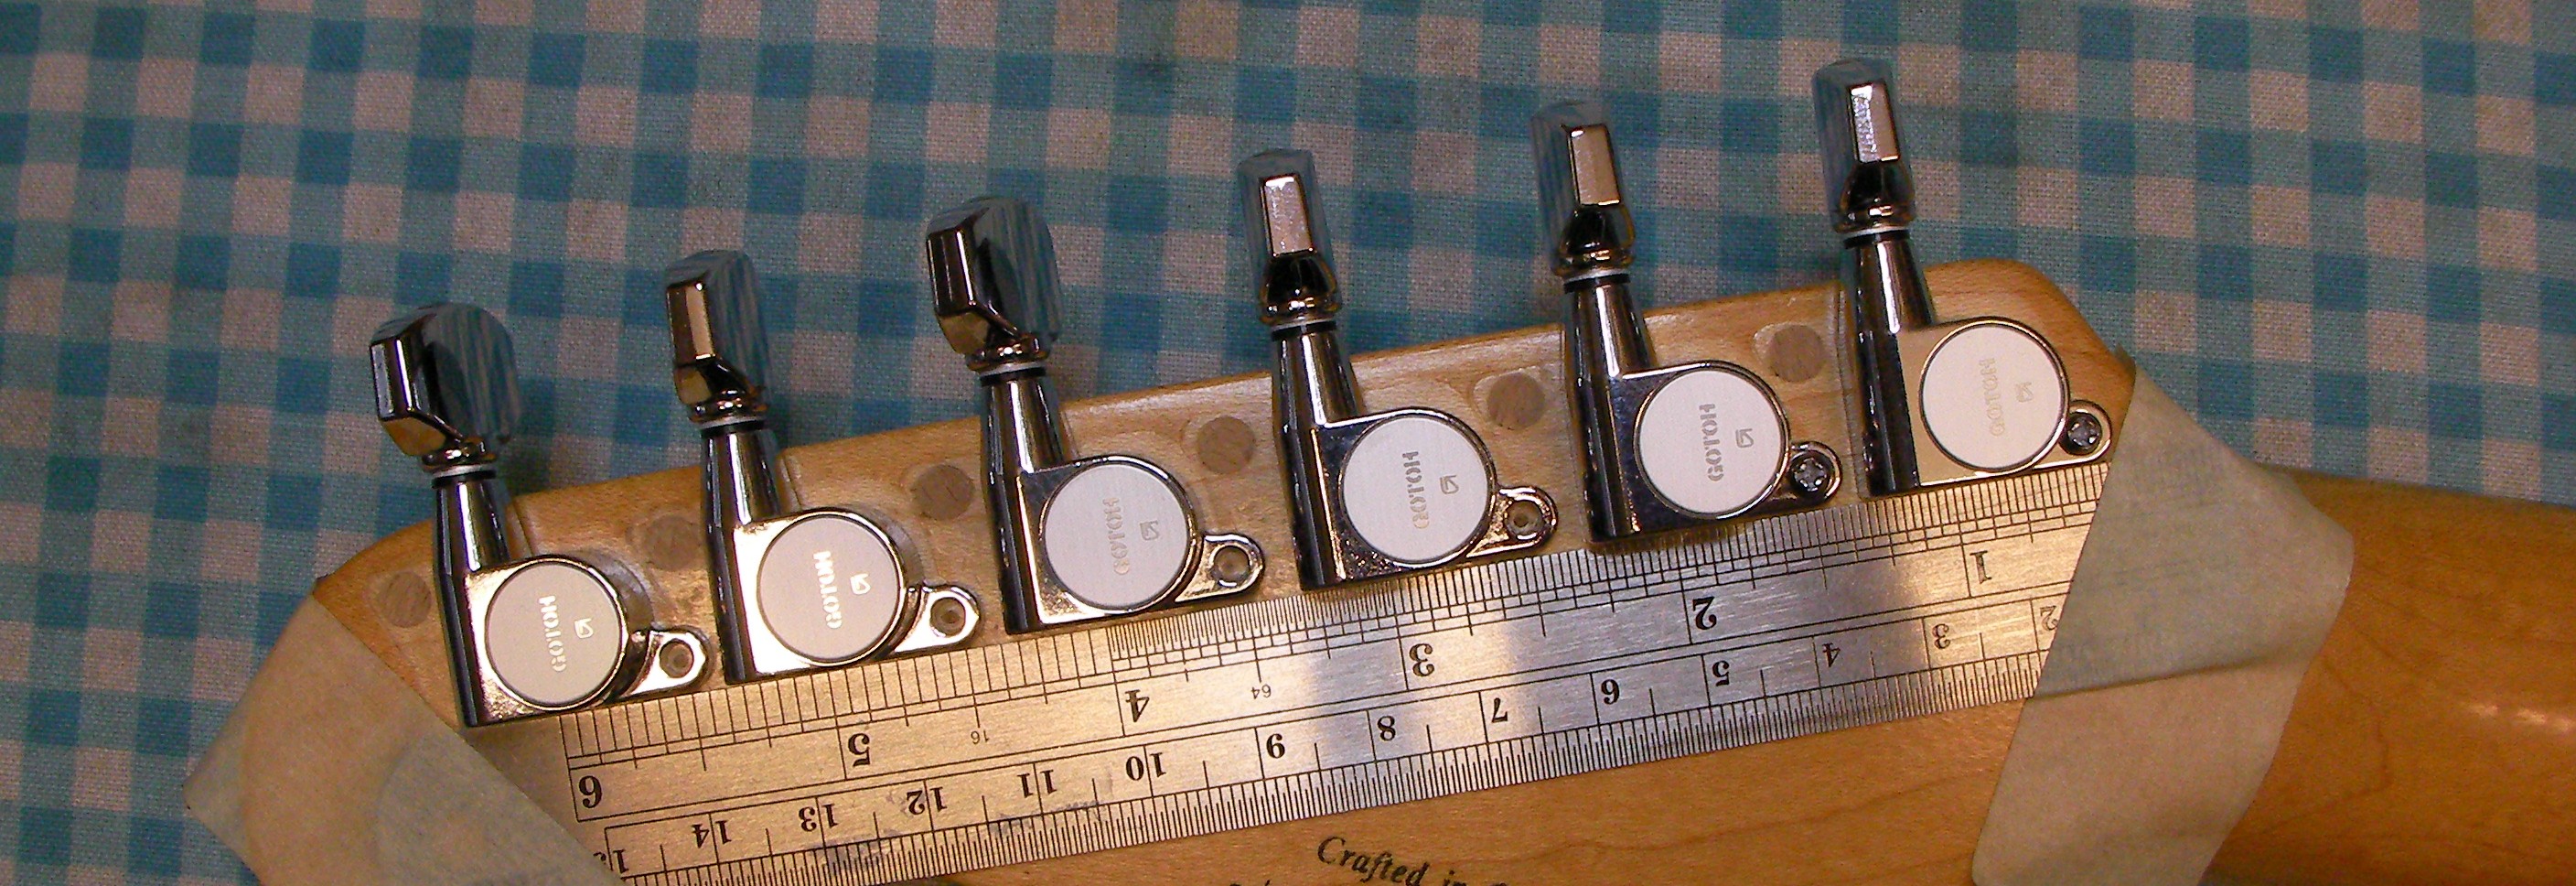
With that done back to the heads. I used a small steel rule to line the heads up before marking and drilling the new screw holes…
Next bolt the neck back on, fit the new nut and strings. I managed to get a better angle on the neck as well so it’s sitting straight now…
With the strings at tension I then re-set the truss rod to get the right neck set…
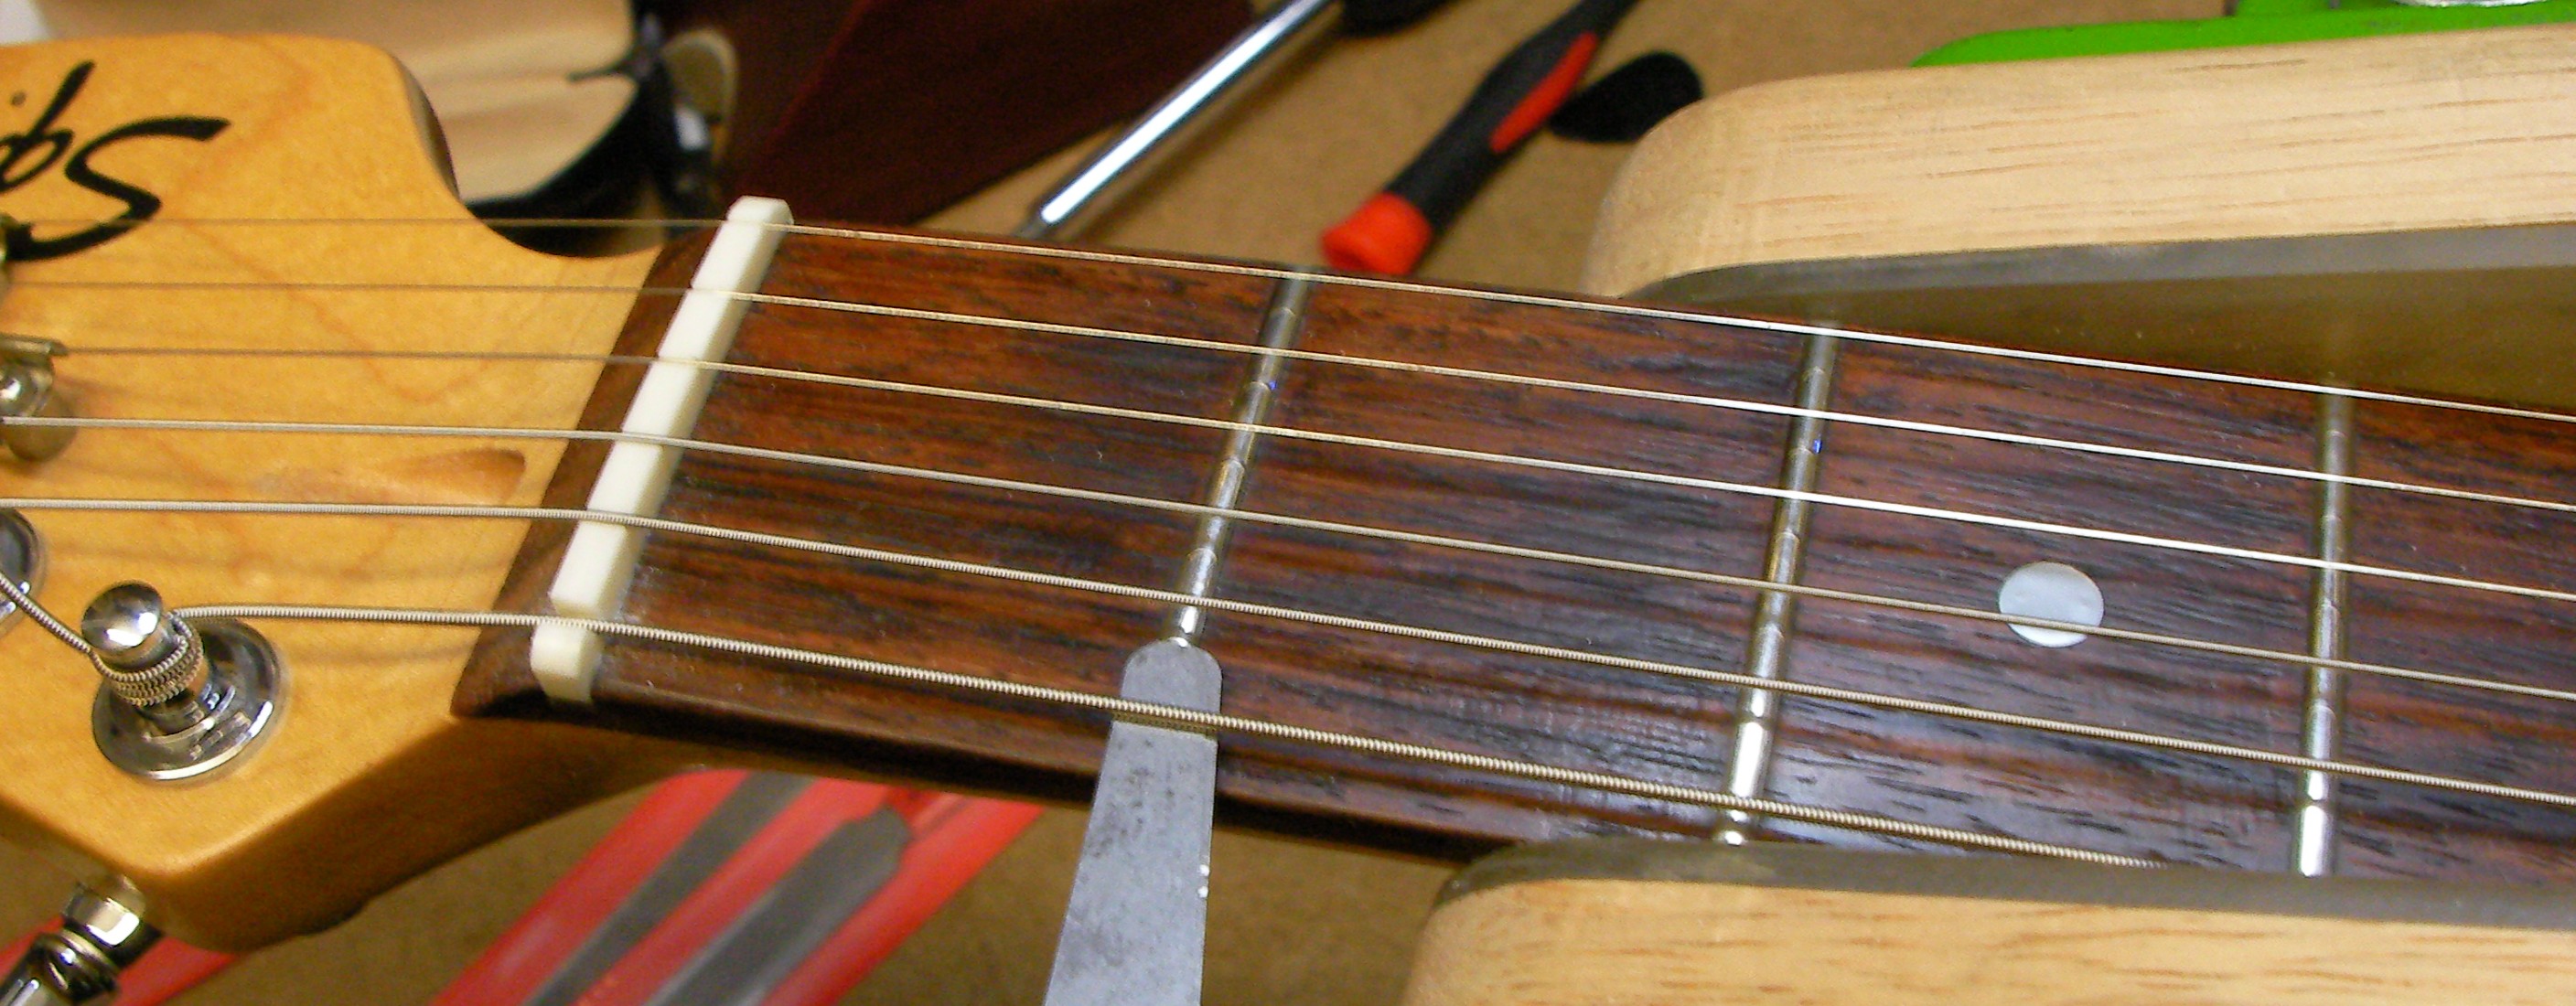
then set about cutting the string slots in the nut to get the right action height at the first fret. You can see I’ve already done the bass E-string…

It’s just a case of using a nut file to bit by bit cut the slot so the right depth, measuring the action height at the 1st fret.
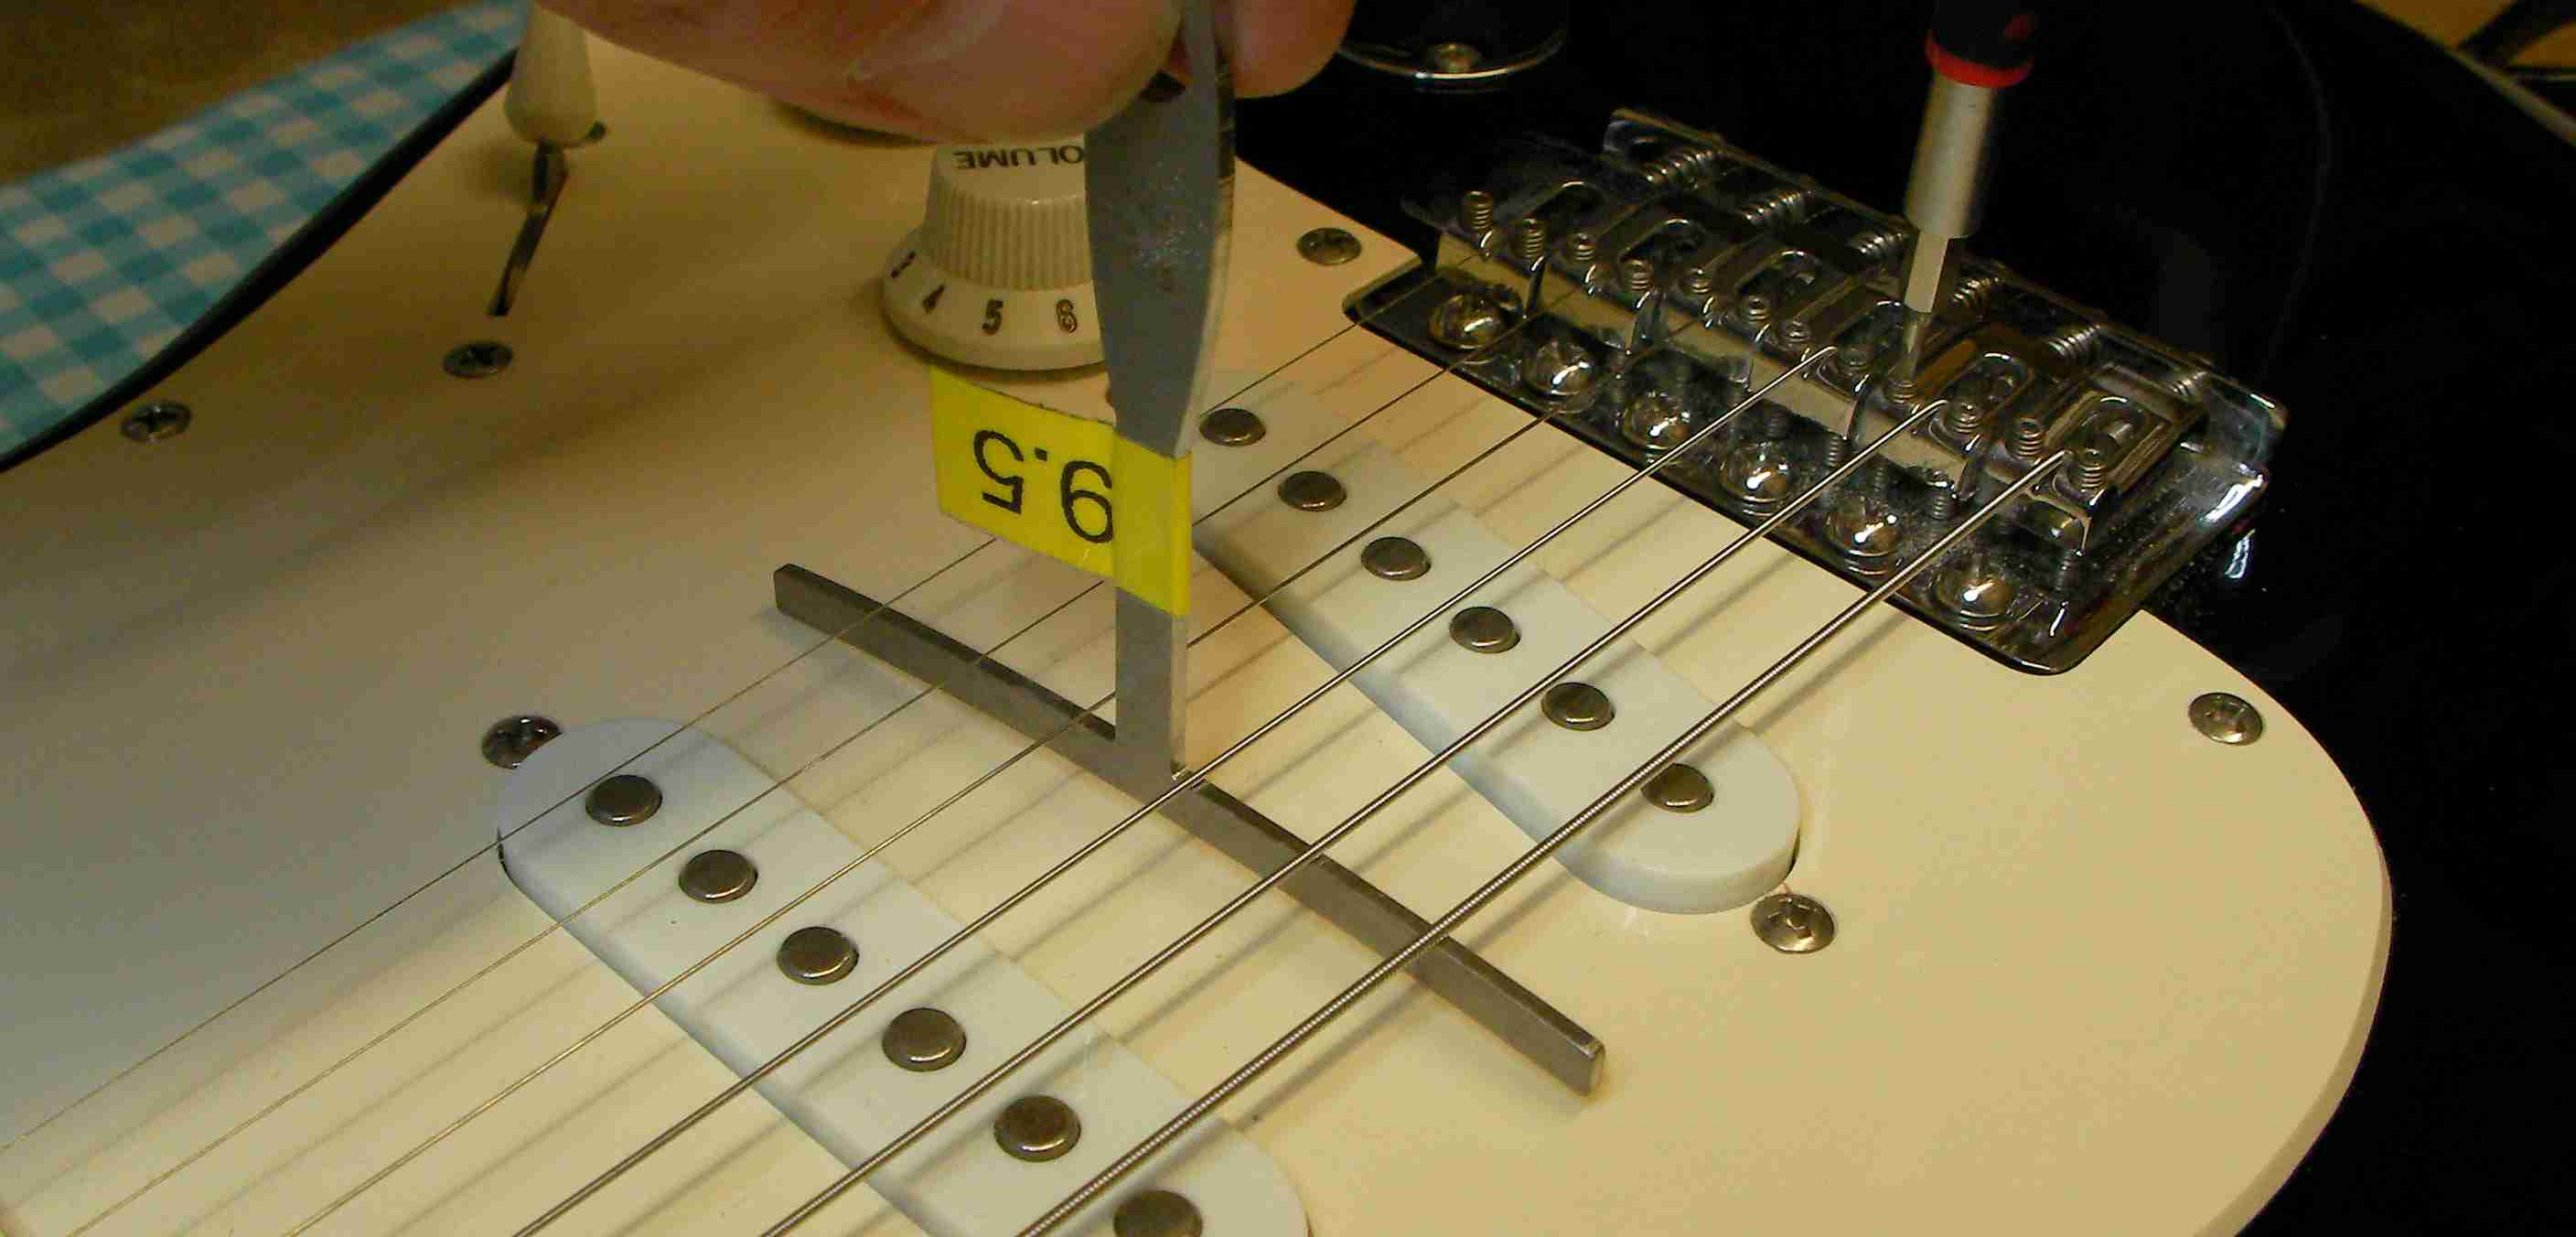
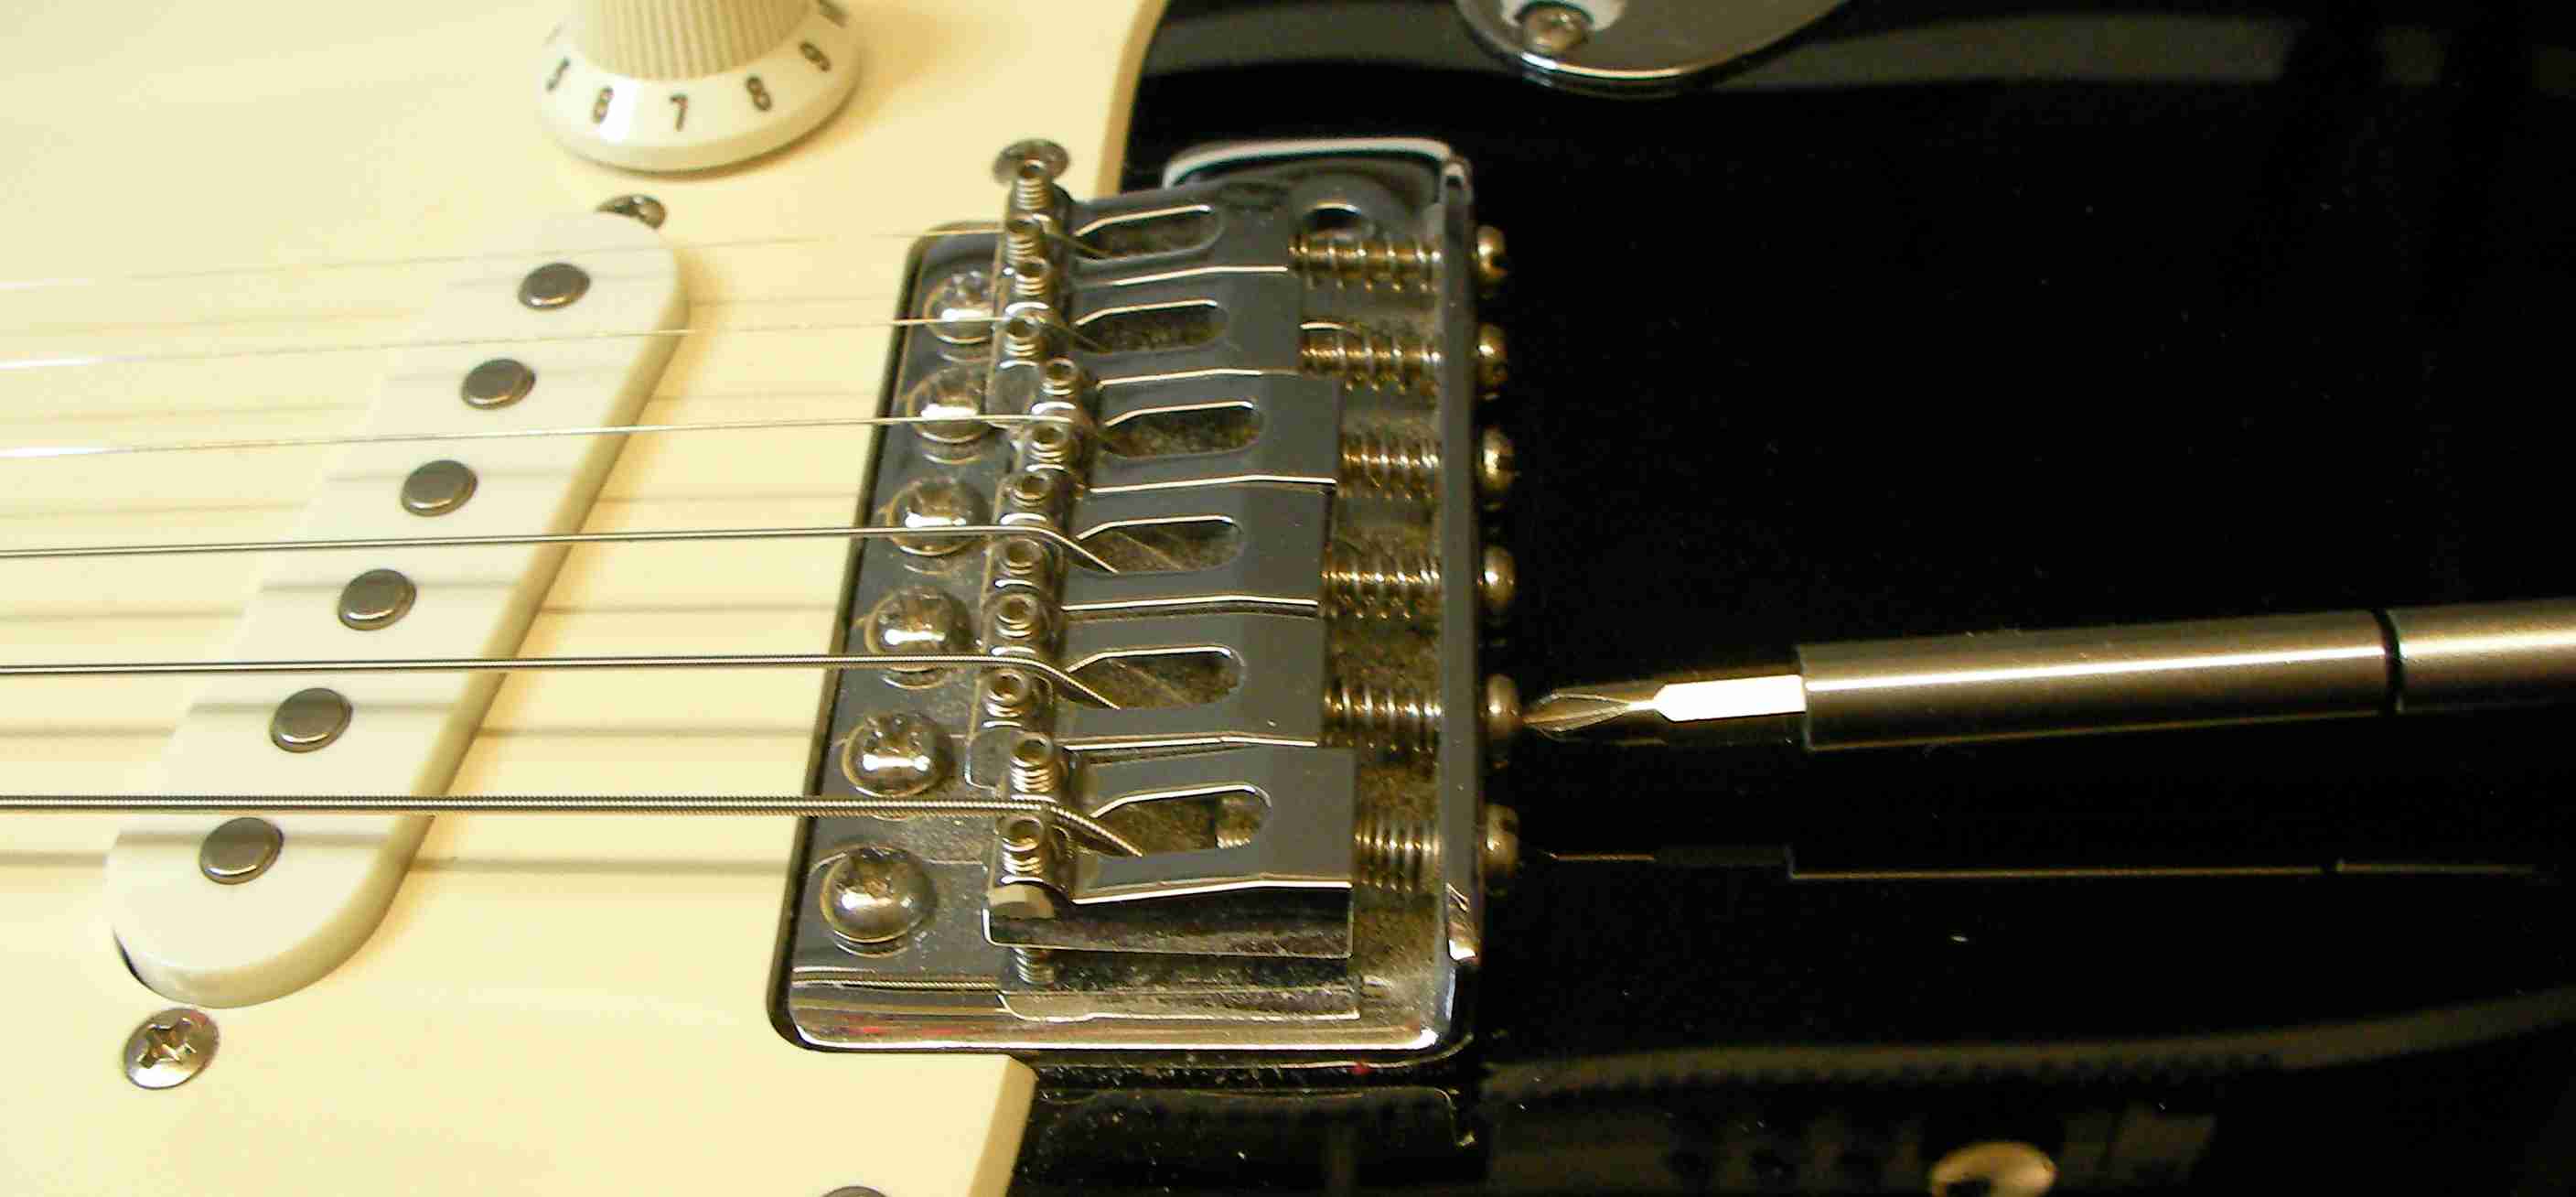
With that done the only thing left to do is adjust the bridge, up and down, and left and right. First I set the height of the two “E” strings, measured at the 12th fret….
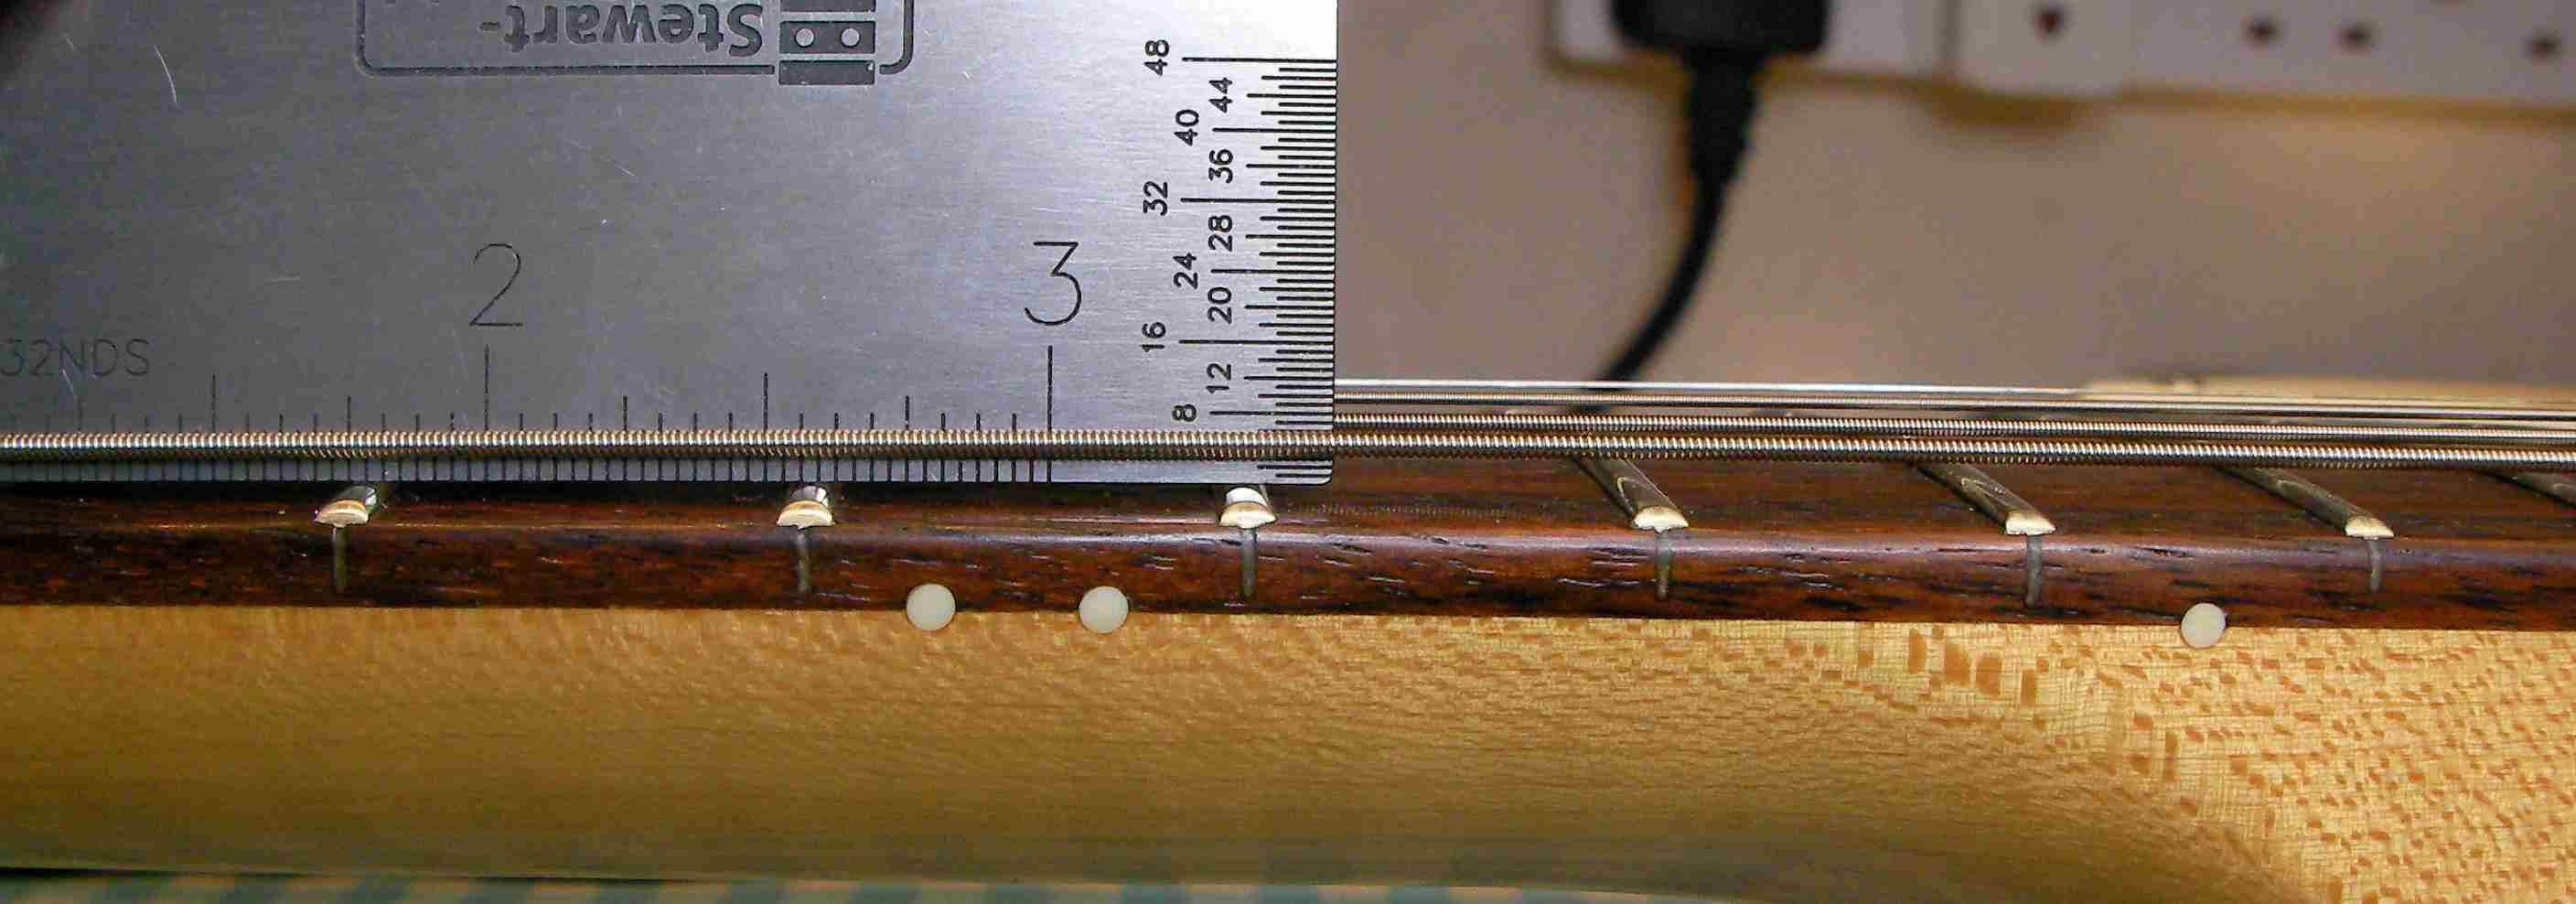

With the two outside string heights set I then use a radius gauge to match the height of the rest of the strings. The radius of the bottom of the strings should match the radius of the fret-board, in this case 9.5″…
Lastly adjust the bridge left and right to set the intonation of each string..
Job done…
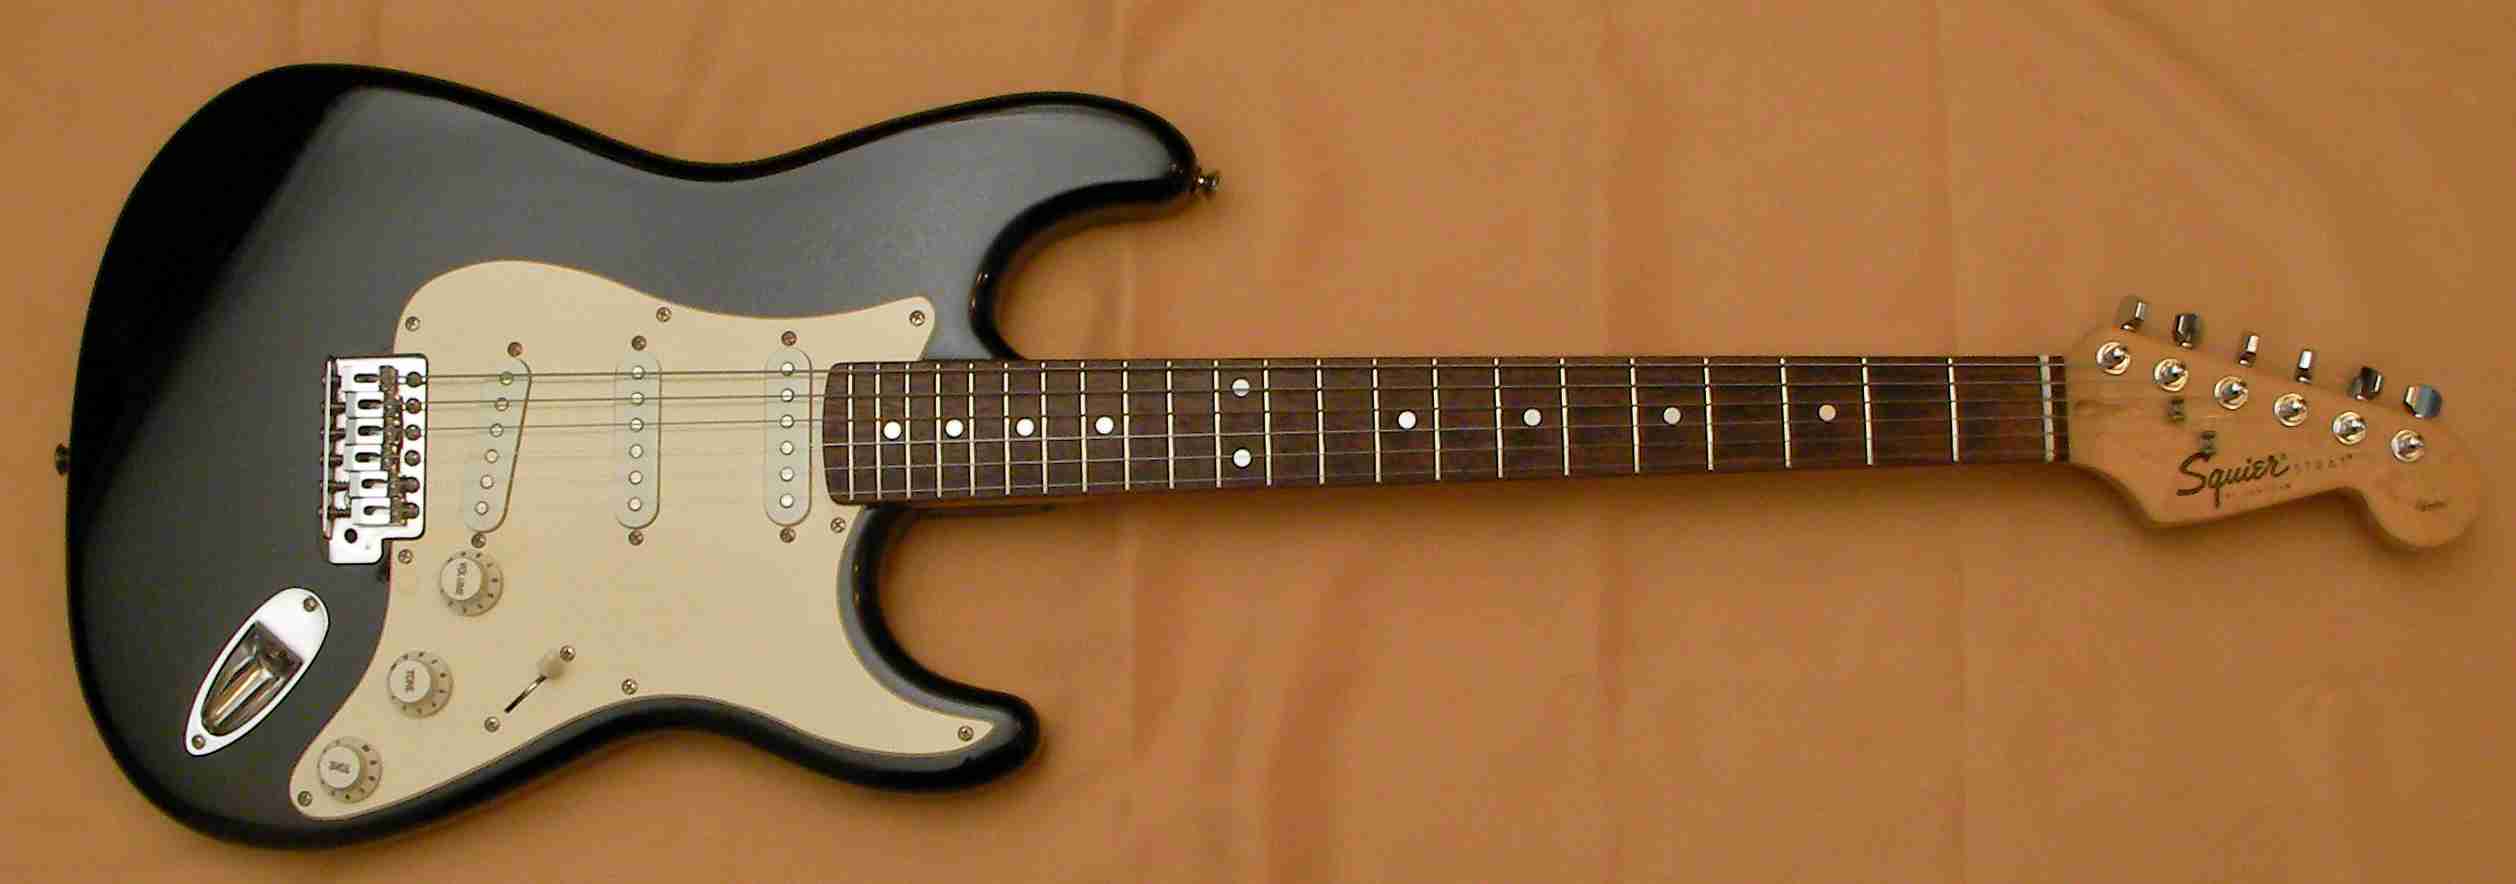
A standard Squire that’s now as sweet as the best of them…
A comment from the owner:
“Hi George
Just to say thank you so much for the work you did on my old Squier Strat. It stays beautifully in tune now with the new machine heads fitted and the fret dress. The new nut & set up have really made the old thing a delight to play. I have been practicing all weekend and love the new action and I feel sure the bone nut has improved the tone?
Great job!!
See you soon for the electronics upgrade.”